
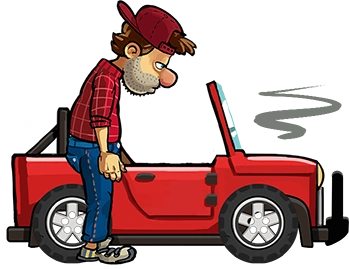
La modalità Avventura è la modalità "vecchia scuola" di Hill Climb Racing. Qui puoi mettere alla prova le tue abilità sui tuoi veicoli preferiti e vedere fino a che punto puoi arrivare senza schiantarti o rimanere senza carburante. Hai quello che serve per guadagnare un posto nelle classifiche?
Carburante
In modalità avventura, la gestione del carburante gioca un ruolo chiave in quanto puoi andare lontano. Mentre guidi, l'indicatore del carburante si esaurisce lentamente (tieni presente che tutti i veicoli hanno serbatoi di carburante di dimensioni diverse). Quando esaurisci il carburante, ti fermerai e il gioco finirà - Ma puoi prolungare la tua corsa raccogliendo le taniche di carburante rosse per riempire il carburante lungo il percorso.
Monete

Durante la tua avventura, puoi raccogliere monete che ti permetteranno di acquistare veicoli, avventure, potenziamenti e altri oggetti aggiuntivi.
Inoltre, ci sono due tipi of speciali sacchi di monete che ottieni la prima volta che raggiungi un traguardo di distanza:
1) "Overall best distance" (OBD) bags:
La prima volta che esplori nuovi territori in un qualsiasi itinerario, indipendentemente dal veicolo che utilizzi, puoi raccogliere delle borse OBD (="Overall Best Distance") lungo il percorso, ad intervalli di circa 200,250 m. Le borse OBD possono essere ottenute solo una volta per ciascun itinerario, quindi l'unico modo per continuare a ottenerli è battere i tuoi vecchi record complessivi, ripetendo gli itinerari.
Metriche: la prima borsa OBD (~ 200 m dall'inizio) ti dà 1.000 monete, quindi le borse successive contengono una quantità incrementale di 50 monete, ovvero 1.050 monete a ~ 400m, 1.100 monete a ~ 600m, ecc. Il premio è limitato a 3.000 monete.
2) "Vehicle-specific" (VS) bags (dalla versione V.1.23):
La prima volta che esplori nuovi territori in un qualsiasi itinerario e indipendentemente dal veicolo che utilizzi, puoi raccogliere delle borse VS (="VEHICLE SPECIFIC") lungo il percorso, ad intervalli di circa 200, 250 m. Le borse VS possono essere ottenute una sola volta per ciascun itinerario/veicolo. Una volta che hai giocato un particolare itinerario avventura con tutti i veicoli disponibili, l'unico modo per continuare a ottenere borse VS è battere i tuoi vecchi record specifici del veicolo.
Metriche: la prima busta VS (~ 200 m dall'inizio) ti dà 100 monete, quindi le borse successive contengono una quantità incrementale di 10 monete, ovvero 110 monete a ~ 400m, 120 monete a ~ 600m, ecc. Il premio è limitato a 300 monete per busta VS.
Nota Bene: La prima volta che esplori nuovi itinerari, non potrai collezionare entrambe le tipologie di borse OBD e VS allo stesso tempo. Le due tipologie di borse possono essere collezionate con il seguente ordine: 1-OBD, 2-VS.
Esempio: Se giochi a Campagna con l'auto Rally. Nelle giocate precedenti, hai realizzato il tuo miglior punteggio a 6.000 m, quindi hai già raccolto borse OBD fino a 6.000 m. Ora raccoglierai borse VS specifiche per il rally fino a 6.000 m. A partire da 6.000 m, invece, raccoglierai borse OBD (la collezione di borse VS si fermerà). La prossima volta che supererai i 6.000 metri sarà la macchina da rally, otterrai le borse VS che hai "perso" la prima volta, fino a raggiungere il massimo.
Adventure Tasks
Ogni tanto vedrai apparire un'icona sul lato destro di un livello di avventura; si tratta di attività avventurose - sfide opzionali generate casualmente che ti ricompenseranno con una cassa bonus. Il contenuto di questo scrigno migliorerà progressivamente man mano che raggiungi ulteriori traguardi di distanza.
L'icona dell'attività Avventura sarà vuota (![]() ) () o dorato e conterrà un veicolo particolare. L'icona vuota indica che è possibile utilizzare un veicolo di propria scelta. Se l'icona è di un veicolo specifico, è necessario utilizzare quel veicolo per ottenere la cassa della ricompensa (ad esempio: se l'icona è della Rally Car, ciò significa che è necessario utilizzare la Rally Car). Se non possiedi quel particolare veicolo o non vuoi usarlo, attendi semplicemente. Dopo qualche tempo appare una piccola "x" nell'angolo dell'icona dell'attività. Toccalo e l'attività verrà eliminata e una nuova assegnata al suo posto.
) () o dorato e conterrà un veicolo particolare. L'icona vuota indica che è possibile utilizzare un veicolo di propria scelta. Se l'icona è di un veicolo specifico, è necessario utilizzare quel veicolo per ottenere la cassa della ricompensa (ad esempio: se l'icona è della Rally Car, ciò significa che è necessario utilizzare la Rally Car). Se non possiedi quel particolare veicolo o non vuoi usarlo, attendi semplicemente. Dopo qualche tempo appare una piccola "x" nell'angolo dell'icona dell'attività. Toccalo e l'attività verrà eliminata e una nuova assegnata al suo posto.
Adventurer Level
A partire dalla versione 1.37.0 sono stati introdotti gli Adventurer Levels. Puoi incrementare il livello guidando con differenti vehicles su differenti piste [[Adventure #List of Adventure Tracks|adventure tracks]] per collezionare stelle. Per un tracciato standard si possono collezionare al massimo 10 000 stelle per veicolo, che corrispondono a 10 000 m. Per le piste speciali si possono guadagnare 15 000 stelle (tranne per Sky Rock Outpost, in cui al massimo vengono attribuite 10 000 stelle) che equivalgono a 5 000 m per veicolo. Per collezionare tutte le stelle è necessario superare il proprio record personale fino ad arrivare a 10 000 m oppure a 5 000 m per le piste speciali.
Puoi vedere il tuo livello corrente nella sezione "Adventure" in alto.
Segue la lista dei possibili livelli (Rank), quante stelle sono necessarie e quale premio viene assegnato raggiungendole.
| Class | Rank | needed stars | adventure track
unlocked |
hat
unlocked |
|---|---|---|---|---|
| Wanderer | Scout | 0+ | ||
| Second Class | 1,000+ | Forest | Forest Crown | |
| First Class | 4,000+ | City | Trash Helmet | |
| Explorer | Scout | 10,000+ | Sky Rock Outpost | Cheese Hat |
| Second Class | 20,000+ | Mountain | Mountain Hat | |
| First Class | 35,000+ | Rustbucket Reef | Octo Hat | |
| Trailblazer | Scout | 50,000+ | Winter | Snowman Helmet |
| Second Class | 100,000+ | Mines | Mine Hat | |
| First Class | 200,000+ | Desert Valley | Cactus Helmet | |
| Ranger | Scout | 250,000+ | Beach | Leafy Hat |
| Second Class | 350,000+ | Backwater Bot | Gator Helmet | |
| First Class | 500,000+ | Racer Glacier | Yeti Hat | |
| Vanguard | Scout | 400,000+ | Patchwork Plant | Welder Helmet |
| Second Class | 650,000+ | |||
| First Class | 750,000+ | |||
| Canyoneer | 1,000,000+ | Legendary Chest | Canyoneer Crown |
Per ogni 50 000 stelle collezionate viene assegnato un nuovo livello: Canyoneer 2, 3, ... e ogni volta viene assegnata una cassa leggendaria.
Adventures
Nuovo con l'update 1.37.0. Sarà aggiunta presto questa sezione.
Principalmente sono le Adventure Tracks, tranne Sky Rock Outpost che è ora una pista speciale.
Special maps
Nuovo con l'update 1.37.0. Questa sezione sarà ampliata presto.
Si ha un numero limitato di tentativi al giorno. Ogni tentativo costa un red ticket e si hanno a disposizione 4 ticket ogni 24 ore.
Per ogni metro percorso vengono assegnate 3 stelle.
Per avere accesso a queste mappe è necessario guadagnare abbastanza stelle per la pista selezionata.
| Name | Background Picture | Rank to unlock | Description |
|---|---|---|---|
| Sky Rock Outpost | 
|
Explorer Scout
or alternatively 200,000 |
Journey through space and set your tires upon the unknown territory of the moon! |
| Forest Trials | picture follows | needed stars in Forest: 40,000 | |
| Intense City | picture follows | needed stars in City: 30,000 | |
| Raging Winter | picture follows | needed stars in Winter: 30,000 |
Top Adventurers
Nuovo con l'update 1.37.0. Si possono consultare i livelli dei più forti adventurers, Si può cercare per nazione, per amici o per tutti gli utenti (global).
List of Adventure Tracks
Puoi trovare la descrizione di ogni mappa here. Puoi sbloccare una mappa con ![]() oppure raggiungendo l'appropriato livello di adventurer.
oppure raggiungendo l'appropriato livello di adventurer.
| Name | Background Picture | Coins to unlock | Rank to unlock | Description |
|---|---|---|---|---|
| Countryside | 
|
Free | Beginning | The perfect place to start exploring the wonders of long distance travel.Are we there yet? |
| Forest | 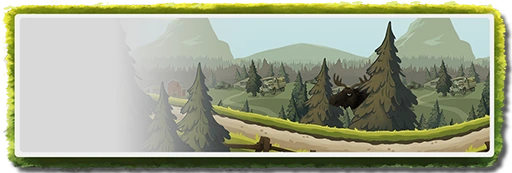
|
40,000 |
Wanderer Second-class (1000+) | Experience the peace and quiet of a national forest. With a race car! |
| City | 
|
120,000 |
Wanderer First-class (4000+) | Bill's favorite city neighborhood with tricky jumps and obstacles. |
| Mountain | 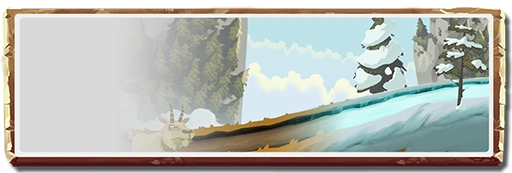
|
300,000 |
Explorer Second-class (20000+) | This track has its ups and downs. How many mountains can you conquer? |
| Rustbucket Reef | 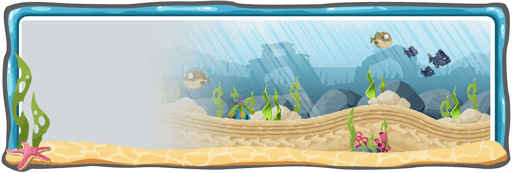
|
350,000 |
Explorer First-class (35000+) | Explore the mysterious sunken depths of
the Rustbucket Reef. Take a deep breath! |
| Winter | 
|
400,000 |
Trailblazer Scout (50000+) | The perfect place to start exploring the wonders
of long distance travel. Are we there yet? |
| Mines | 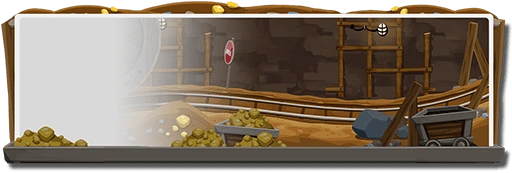
|
500,000 |
Trailblazer Second-class (100000+) | Venture down the mines. Who knows what
kind of treasures lies there? |
| Desert Valley | 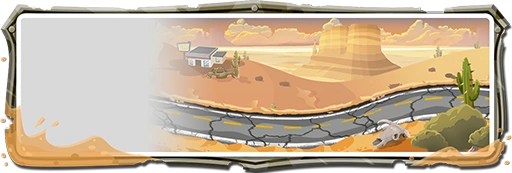
|
600,000 |
Trailblazer First-class (200000+) | Bill's got a long road ahead.
Hopefully he wears enough sunblock! |
| Beach | 
|
700,000 |
Ranger Scout (250000+) | Pack your towel and swimming suit.
Bill's heading to the beach! |
| Backwater Bog | 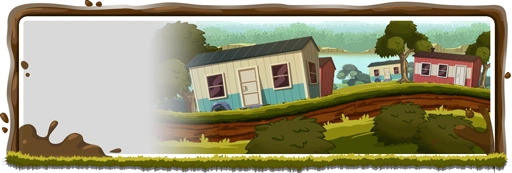
|
800,000 |
Ranger Second-class (350000+) | Conquer the muddy slopes, smash through the
trash & dodge the alligators of the Backwater Bog. |
| Racer Glacier | 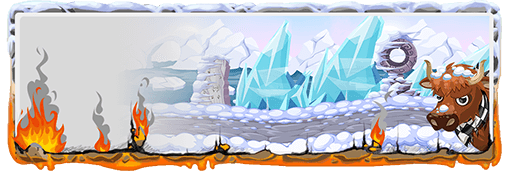
|
800,000 |
Ranger First-class (500,000+ Stars) | Brave the winds, avoid the geysers, keep out of the lava and watch out
for dinosaurs as you uncover the mystery behind the ancient Racer Glacier! |
| Patchwork Plant | 800,000 |
Vanguard Scout (600,000+ Stars) | Occupational Health & Safety? What's that? | |
| Sky Rock Outpost |
|
200,000 |
Explorer Scout (10,000+ Stars) | Journey through space and set your tires upon the unknown territory of the moon! |
| Forest Trials | pic follows | not possible | 40,000 stars in Forest | |
| Intense City | pic follows | not possible | 30,000 stars in City | |
| Raging Winter | pic follows | not possible | 30,000 stars in Winter |
Adventure Tracks Analytics
Ecco alcune tabelle che riassumono ciò che puoi trovare in ogni itinerairio, in particolare le posizioni dei distributori di carburante, diverse difficoltà, ecc. Questo argomento è stato essenzialmente realizzato per aiutare le persone a ottenere un record personale migliore nelle loro mappe di avventura, con tutte le informazioni di cui hanno bisogno, senza perdere molto tempo a guardare video su YouTube o replay in-game. Ora puoi capire cosa ti aspetta dopo il tuo miglior record personale !!!
Note: Le tabelle contengono i 3 distributori di carburante successivi dopo il WR corrente(per tutti i veicoli).
Countryside
L'avventura Countryside è una delle più facili, perché puoi raggiungere lunghe distanze con veicoli a bassa potenza. La migliore mappa di avventura per i principianti che vogliono fare molti chilometri o per guadagnare monete. Questa avventura non è sconnessa come l'avventura in campagna (per esempio) ma ha molte salite e discese regolari (Nota: quelle non saranno descritte di seguito perché sono ripetitive); quindi devi superarli molto bene per avere la possibilità di raggiungere il prossimo canestro quando guidi ad alta distanza. Questa avventura non ha grandi trappole, perché possono essere facilmente superate con una buona gestione del tuo veicolo. Tuttavia, fai attenzione ai registri che sono quasi ovunque sulla mappa; è l'ostacolo tipico che può rovinare la tua corsa. Fai attenzione alla testa di Bill quando guidi vicino a questi ostacoli. Ecco un elenco riepilogativo di tutte le posizioni di carburante e le maggiori difficoltà (che sono descritte di seguito) in Forest. Per quanto riguarda le posizioni del carburante, è possibile aggiungere alcuni dettagli su dove si trova esattamente il contenitore.
Le difficoltà:
- Barns: Luoghi pericolosi per veicoli ad alta quota! È necessario guidare con attenzione se si dispone di questo tipo di veicolo!
- Climbs: Possono avere diverse difficoltà, che sono essenzialmente determinate dalla pendenza:
- Medio
- Difficile
- Molto Difficile
| Fuel position | Fuel location
(in meters) |
Gap between
2 fuels (in meters) |
Difficulties | |
|---|---|---|---|---|
| Barn location
(in meters) |
Medium, Hard and Very Hard Climbs
(in meters (from start to end)) | |||
| Start | Full tank | |||
| 1st | 152 | 152 | ||
| 2nd | 297 | 145 | ||
| 3rd | 452 | 155 | ||
| 4th | 602 | 150 | ||
| 5th | 800 | 198 | ||
| 6th | 1,001 | 201 | ||
| 7th | 1,202 | 201 | ||
| 8th | 1,451 (bridge) | 249 | ||
| 9th | 1,701 | 250 | ||
| 10th | 1,950 | 249 | ||
| 11th | 2,249 | 299 | Medium (2,117->2,150) | |
| 12th | 2,552 | 303 | Medium (2,715->2,734) | |
| 13th | 2,851 | 299 | Medium (3,125->3,142) | |
| 14th | 3,148 (bridge) | 297 | 3,227
3,449 |
|
| 15th | 3,498 | 350 | 3,741
3,846 |
Medium (3,725->3,741) |
| 16th | 3,851 (barn) | 353 | 4,179 | Medium (3,883->3,898)
Very Hard (7,526->7,554) |
| 17th | 4,202 (after barn) | 351 | 4,367 | Hard (4,347->4,367) |
| 18th | 4,600 | 398 | 4,676 | Medium (4,626->4,652)
Medium (4,753->4,773) |
| 19th | 4,999 (before barn) | 399 | 5,007 | Medium (5,125->5,139) |
| 20th | 5,402 (bridge) | 403 | 5,315
5,629 5,768 |
|
| 21st | 5,852 (bridge) | 450 | Hard (5,983->6,003) | |
| 22nd | 6,303 (after a
downhill) |
451 | Medium (6,372->6,396)
Medium (6,476->6,528) | |
| 23rd | 6,751 (climbing) | 448 | Medium (6,856->6,891)
Hard (6,986->7,031) | |
| 24th | 7,201 (climbing | 450 | 7,266
7,348 7,425 |
Medium (7,339->7,347)
Very Hard (7,526->7,554) Hard (7,676->7,732) |
| 25th | 7,701 (climbing) | 500 | 7,835 | Hard (7,820->7,833)
Medium (8,062->8,091) Hard (8,110->8,129) |
| 26th | 8,203 (bridge) | 502 | 8,478 | Very Hard (8,221->8,273)
Medium (8,393->8,420) Hard (8,613->8,642) |
| 27th | 8,699 (downhill) | 496 | 9,197 | Medium (8,751->8,827)
Hard (8,909->8,964) |
| 28th | 9,253 (downhill) | 554 | Very Hard (9,283->9,317)
Medium (9,559->9,589) Very Hard (9,437->9,479) Hard (9,685->9,702) Hard (9,777->9,836) | |
| 29th | 9,800 (climbing) | 547 | Very Hard (9,959->9,993)
Medium (10,108->10,152) | |
| 30th | 10,349 (climbing) | 549 | 10,817
10,923 |
Hard (10,500->10,558)
Hard (10,626->10,692) Medium (10,762->10,817) |
| 31st | 10,951 (after barn) | 602 | 11,025 | Hard (11,001->11,025)
Very Hard (11,162->11,195) |
| 32nd | 11,552 (bridge) | 601 | 11,640 | Medium (11,565->11,597)
Hard (11,695->11,741) Hard (11,854->11,895) |
| 33rd | 12,151 (after a
bridge; climbing) |
599 | 12,439
12,707 |
Hard (12,245->12,305)
Very Hard (12,382->12,439) Medium (12,542->12,592) |
| 34th | 12,751 | 600 | 12,906
13,199 |
Very Hard (12,783->12,809)
Very Hard (12,931->12,989) |
| 35th | 13,403 (downhill) | 652 | 13,412 | Hard (13,467->13,498)
Hard (13,639->13,683) Hard (13,991->14,056) |
| 36th | 14,052 (climbing) | 651 | Very Hard (14,127->14,172)
Medium (14,515->14,581) Hard (14,651->14,720) | |
| 37th | 14,701 (climbing) | 649 | Hard (14,833->14,878)
Hard (15,177->15,217) Very Hard (15,338->15,390) | |
| 38th | 15,401 (bridge) | 700 | Medium (15,468->15,534)
Hard (15,729->15,781) Very Hard (15,860->15,907) Hard (16,031->16,060) | |
| 39th | 16,101
(after a bridge) |
700 | ||

Forest
L'avventura Forest è una delle più semplici, perché puoi raggiungere alte distanze con veicoli a bassa potenza. La migliore mappa di avventura per i principianti che vogliono fare molti chilometri o per guadagnare monete. Questa avventura non è sconnessa come l'avventura in campagna (per esempio) ma ha molte salite e discese regolari (Nota: quelle non saranno descritte di seguito perché sono ripetitive); quindi devi superarli molto bene per avere la possibilità di raggiungere il prossimo canestro quando guidi ad alta distanza. Questa avventura non ha grandi trappole, perché possono essere facilmente superate con una buona gestione del tuo veicolo. Tuttavia, fai attenzione ai registri che sono quasi ovunque sulla mappa; è l'ostacolo tipico che può rovinare la tua corsa. Fai attenzione alla testa di Bill quando guidi vicino a questi ostacoli. Ecco un elenco riepilogativo di tutte le posizioni di carburante e le maggiori difficoltà (che sono descritte di seguito) in Forest. Per quanto riguarda le posizioni del carburante, è possibile aggiungere alcuni dettagli su dove si trova esattamente il contenitore.
Difficoltà:
- Water Jumps: Questi salti sono pericolosi, perché se sbagliuno di essi e ti immergi nella pozza d'acqua, muori! Si possono distinguere due tipi di salti:
- Type-A: Un grosso ceppo tenuto da due corde che si trova sopra il buco dell'acqua per aiutarti a superarlo.
- Type-B: Un piccolo ceppo tenuto da una sola corda (il punto di fissazione è al centro del tronco) che si trova sopra il foro dell'acqua per aiutarti a superarlo. Fai attenzione: il registro potrebbe ruotare su se stesso!
- Swinging Logs: A volte, possono apparire registri oscillanti. Di solito oscillano avanti e indietro. Si possono distinguere due tipi di registri:
- Type-1: Il tronco oscilla vicino al suolo. Puoi facilmente passarli se fai il piccolo salto prima di farlo correttamente.
- Type-2: Il registro oscilla in aria. Fai attenzione ai veicoli ad alta quota se ne guidi uno!
| Fuel position | Fuel location
(in meters) |
Gap between
2 fuels (in meters) |
Difficulties | |
|---|---|---|---|---|
| Water Jumps
location (in meters) |
Swinging Logs
location (in meters) | |||
| Start | Full tank | |||
| 1st | 170 | 170 | ||
| 2nd | 291 | 121 | ||
| 3rd | 411 | 120 | ||
| 4th | 532 | 121 | ||
| 5th | 658 | 126 | ||
| 6th | 778 (downhill) | 120 | ||
| 7th | 898 | 120 | ||
| 8th | 1,080 (downhill) | 182 | ||
| 9th | 1,258 | 178 | Type-2 (1,281) | |
| 10th | 1,437 | 179 | ||
| 11th | 1,616 (log zone;
at the bottom) |
179 | ||
| 12th | 1,797 (climbing) | 181 | ||
| 13th | 1,995 | 198 | ||
| 14th | 2,174 (climbing) | 179 | ||
| 15th | 2,424 | 250 | ||
| 16th | 2,659 | 235 | Type-2 (2,768) | |
| 17th | 2,909 (downhill) | 250 | ||
| 18th | 3,150 (log zone;
at the bottom) |
241 | ||
| 19th | 3,391 | 241 | ||
| 20th | 3,639 | 248 | ||
| 21st | 3,914 (log zone) | 275 | ||
| 22nd | 4,239 | 325 | ||
| 23rd | 4,540 (downhill) | 301 | Type-A (4,672) | |
| 24th | 4,832 (log zone;
slow down!) |
292 | ||
| 25th | 5,153 | 321 | Type-2 (5,411) | |
| 26th | 5,453 (downhill) | 300 | Type-1 (5,703) | |
| 27th | 5,753 (downhill) | 300 | Type-1 (6,060) | |
| 28th | 6,113 | 360 | ||
| 29th | ||||
| 30th | ||||
| 31st | ||||
| 32nd | ||||
| 33rd | ||||
| 34th | ||||
| 35th | ||||
| 36th | ||||
| 37th | ||||
| 38th | ||||
| 39th | ||||
| 40th | ||||
| 41st | ||||
| 42nd | ||||
| 43rd | ||||
| 44th | ||||
| 45th | ||||
| 46th | ||||
| 47th | ||||
| 48th | ||||
| 49th | ||||
| 50th | ||||

City
Questa pista è una buona scelta per coloro che preferiscono le corse su asfalto. Puoi anche andare veloce in questa traccia. Fai attenzione però, perché in città ci sono molti ostacoli pericolosi che sembrano usciti da un film (sono elencati di seguito) alcuni sono piuttosto facili, altri potrebbero essere più difficili (si consiglia un veicolo veloce) Sotto di te " Troverai anche le posizioni dei prelievi di carburante.
Le difficoltà:
- Pitfalls:Lacune riempite con acqua. Cadere in loro porterà a una morte istantanea. Tutti hanno qualcosa per aiutarti a saltare attraverso. Nota: ci sono quelli senza acqua occupati dai container delle navi. Quelli non si traducono in una partita istantanea e puoi sfuggirli.
- Draw Bridges: Bascule Draw Ponti che si aprono costantemente su insidie piene d'acqua. Questi sono piuttosto facili da superare. Basta guidare veloce mentre li attraversi. Anche se non tutti sono così.
- Type 1:Entrambe le estremità vanno su e giù. Piuttosto facile da superare
- Type 2: Ha solo 1 lato. Semplice come Type 1
- Type 3: Ti porterà a guidare su travi di ferro sospese o contenitori di navi sospese. Alcuni potrebbero avere un'estremità opposta.
- Iron Beams: Trovato sospeso sull'acqua. La posizione in cui atterri su di loro gioca un ruolo importante perché si sposteranno. Se non stai attento, potrebbe mandarti in una trappola d'acqua, risultando in una partita finita.
- Type 1: Appende di 1 corda. Può muoversi a seconda di dove atterri su di esso.
- Type 2: Si blocca con 2 corde. Più stabile del tipo 1
- Ship containers: Sparsi per la pista. Sono un ostacolo, soprattutto per i veicoli ad alta quota. Possono anche essere spostati se vengono colpiti abbastanza duramente o hanno un punto sospeso in aria e viene a contatto con il veicolo. (Nota: c'è un bug in cui le ruote possono agganciarsi attraverso la parte superiore del contenitore)
- Type 1: Sta semplicemente a terra. Non rappresentano davvero una minaccia, ma possono essere un problema per i veicoli ad alta quota.
- Type 2: Un gruppo di contenitori, impilati uno sull'altro. Possono essere impilati bene o in modo non uniforme.
- Type 3: Contenitori che formano ponti su insidie senz'acqua (come accennato in precedenza, queste insidie qui non sono zone di uccisione istantanea e il giocatore può eventualmente uscirne) Dal momento che questi contenitori tendono a consegnare l'aria, sono più facili da spostare rispetto al quelli completamente a terra.
- Type 4: Questi contenitori sono appesi alle corde sull'acqua. Proprio come le travi di ferro, possono ribaltarsi a seconda di dove atterra il veicolo. Nessuno di loro pende da 2 corde.
| Fuel position | Fuel location
(in meters) |
Gap between
2 fuels (in meters) |
|---|---|---|
| Start | Full tank | |
| 1st | 156 | |
| 2nd | 290 | |
| 3rd | 410 | |
| 4th | 530 | |
| 5th | 652 | |
| 6th | 741 | |
| 7th | 890 | |
| 8th | 1056 | |
| 9th | 1261 | |
| 10th | 1241 | |
| 11th | 1624 | |
| 12th | 1784 | |
| 13th | 1982 | |
| 14th | 2162 | |
| 15th | 2417 | |
| 16th | 2628 | |
| 17th | ||
| 18th | ||
| 19th | ||
| 20th | ||
| 21st | ||
| 22nd | ||
| 23rd | ||
| 24th | ||
| 25th | ||
| 26th | ||
| 27th | ||
| 28th | ||
| 29th | ||
| 30th | ||
| 31st | ||
| 32nd | ||
| 33rd | ||
| 34th | ||
| 35th | ||
| 36th | ||
| 37th | ||
| 38th | ||
| 39th | ||
| 40th | ||
| 41st | ||
| 42nd | ||
| 43rd | ||
| 44th | ||
| 45th | ||
| 46th | ||
| 47th | ||
| 48th | ||
| 49th | ||
| 50th |

Mountain
| Fuel position | Fuel location
(in meters) |
Gap between
2 fuels (in meters) |
|---|---|---|
| Start | Full tank | |
| 1st | 133 | 133 |
| 2nd | 213 | 80 |
| 3rd | 293 | 80 |
| 4th | 373 | 80 |
| 5th | 453 | 80 |
| 6th | 533 | 80 |
| 7th | 613 | 80 |
| 8th | 733 | 120 |
| 9th | 853 | 120 |
| 10th | 973 | 120 |
| 11th | 1076 | 103 |
| 12th | 1193 | 117 |
| 13th | 1333 | 140 |
| 14th | 1453 | 120 |
| 15th | 1613 | 160 |
| 16th | 1773 | 160 |
| 17th | 1933 | 160 |
| 18th | 2063 | 190 |
| 19th | 2141 | 78 |
| 20th | 2303 | 163 |
| 21st | 2463 | 160 |
| 22nd | 2663 | 200 |
| 23rd | 2833 | 160 |
| 24th | 3073 | 250 |
| 25th | 3273 | 200 |
| 26th | 3473 | 200 |
| 27th | 3893 | 420 |
| 28th | 4133 | 240 |
| 29th | 4373 | 240 |
| 30th | 4643 | 270 |
| 31st | 4913 | 270 |
| 32nd | 5183 | 270 |
| 33rd | 5423 | 240 |
| 34th | 5722 | 300 |
| 35th | 6003 | 280 |
| 36th | 6283 | 280 |
| 37th | 6583 | 300 |
| 38th | 6893 | 310 |
| 39th | 7443 | 550 |
| 40th | ||
| 41st | ||
| 42nd | ||
| 43rd | ||
| 44th | ||
| 45th | ||
| 46th | ||
| 47th | ||
| 48th | ||
| 49th | ||
| 50th |

Rustbucket Reef
| Fuel position | Fuel location
(in meters) |
Gap between
2 fuels (in meters) |
|---|---|---|
| Start | Full tank | |
| 1st | ||
| 2nd | ||
| 3rd | ||
| 4th | ||
| 5th | ||
| 6th | ||
| 7th | ||
| 8th | ||
| 9th | ||
| 10th | ||
| 11th | ||
| 12th | ||
| 13th | ||
| 14th | ||
| 15th | ||
| 16th | ||
| 17th | ||
| 18th | ||
| 19th | ||
| 20th | ||
| 21st | ||
| 22nd | ||
| 23rd | ||
| 24th | ||
| 25th | ||
| 26th | ||
| 27th | ||
| 28th | ||
| 29th | ||
| 30th | ||
| 31st | ||
| 32nd | ||
| 33rd | ||
| 34th | ||
| 35th | ||
| 36th | ||
| 37th | ||
| 38th | ||
| 39th | ||
| 40th | ||
| 41st | ||
| 42nd | ||
| 43rd | ||
| 44th | ||
| 45th | ||
| 46th | ||
| 47th | ||
| 48th | ||
| 49th | ||
| 50th |

Winter
| Fuel position | Fuel location
(in meters) |
Gap between
2 fuels (in meters) |
|---|---|---|
| Start | Full tank | |
| 1st | ||
| 2nd | ||
| 3rd | ||
| 4th | ||
| 5th | ||
| 6th | ||
| 7th | ||
| 8th | ||
| 9th | ||
| 10th | ||
| 11th | ||
| 12th | ||
| 13th | ||
| 14th | ||
| 15th | ||
| 16th | ||
| 17th | ||
| 18th | ||
| 19th | ||
| 20th | ||
| 21st | ||
| 22nd | ||
| 23rd | ||
| 24th | ||
| 25th | ||
| 26th | ||
| 27th | ||
| 28th | ||
| 29th | ||
| 30th | ||
| 31st | ||
| 32nd | ||
| 33rd | ||
| 34th | ||
| 35th | ||
| 36th | ||
| 37th | ||
| 38th | ||
| 39th | ||
| 40th | ||
| 41st | ||
| 42nd | ||
| 43rd | ||
| 44th | ||
| 45th | ||
| 46th | ||
| 47th | ||
| 48th | ||
| 49th | ||
| 50th |

Mines
| Fuel position | Fuel location
(in meters) |
Gap between
2 fuels (in meters) |
|---|---|---|
| Start | Full tank | |
| 1st | ||
| 2nd | ||
| 3rd | ||
| 4th | ||
| 5th | ||
| 6th | ||
| 7th | ||
| 8th | ||
| 9th | ||
| 10th | ||
| 11th | ||
| 12th | ||
| 13th | ||
| 14th | ||
| 15th | ||
| 16th | ||
| 17th | ||
| 18th | ||
| 19th | ||
| 20th | ||
| 21st | ||
| 22nd | ||
| 23rd | ||
| 24th | ||
| 25th | ||
| 26th | ||
| 27th | ||
| 28th | ||
| 29th | ||
| 30th | ||
| 31st | ||
| 32nd | ||
| 33rd | ||
| 34th | ||
| 35th | ||
| 36th | ||
| 37th | ||
| 38th | ||
| 39th | ||
| 40th | ||
| 41st | ||
| 42nd | ||
| 43rd | ||
| 44th | ||
| 45th | ||
| 46th | ||
| 47th | ||
| 48th | ||
| 49th | ||
| 50th |

Desert Valley
Desert Valley è un'avventura calda e lunga ma con molte trappole e suggerimenti sulla velocità. Tuttavia, al di fuori delle trappole, la strada è piuttosto piatta, quindi può essere considerata una mappa ad alta velocità in cui puoi andare più veloce e compensare il tempo perso quando attraversi luoghi difficili. Più distanza raggiungi, più trappole difficili vedrai. Ecco un elenco riepilogativo di tutte le posizioni di carburante e le maggiori difficoltà (che sono descritte di seguito) nella Desert Valley. Per quanto riguarda le posizioni del carburante, è possibile aggiungere alcuni dettagli su dove si trova esattamente il contenitore.
Difficoltà:
- Logs:Ogni tronco è tenuto da 1 o 2 corde (eccetto il Tipo-D) e ti aiuterà a percorrere una grande buca che contiene Deadly Quicksands (DQ) o niente (/) (tranne il Tipe-D).
- Type-A: (In media lungo 60 metri) Un registro che è tenuto da 2 corde (diversi punti di fissaggio sul registro) ed è sempre orizzontale.
- Type-B: (In media lungo 50 metri) Un tronco che è tenuto da 2 corde (diversi punti di fissazione sul tronco) ma, poiché i punti di fissazione sono nello stesso punto su una roccia più alta, fanno sì che il tronco segua un arco oscillando avanti e indietro.
- Type-C: (In media lungo 50 metri) Un tronco che è tenuto solo da 1 corda e il suo punto di fissaggio è al centro del tronco. Ciò significa che il registro può ruotare su se stesso, il che rende il Type-C il più difficile da attraversare. Avrai bisogno di un tempismo esatto per sperare di passare attraverso questa trappola!
- Type-D: (In media lungo 70 metri) 4 grandi tronchi che si trovano (galleggianti) su sabbie mobili mortali. È necessario guidare su quei registri per passare attraverso questa trappola. Non atterrare sulle sabbie mobili perché non sarai quasi in grado di tornare su un tronco e morirai!
- Caves: (In media lungo 80 metri) A volte appariranno grotte. Luoghi pericolosi per veicoli ad alta quota! Verrà riassunto solo un tipo di grotta, perché questa è la più difficile e può rovinare la tua corsa. Il seguente tipo di grotta si trova in 2 piccole rocce (c'è uno spazio tra loro) che ti aiutano a continuare a guidare su una sorta di piccolo foro che contiene un DQ o /.
- Sudden Climbs: A volte compaiono grandi salite ma sono brevi (mediamente lunghe 45 metri). Questa non è in realtà una trappola quando la testa del guidatore colpisce qualcosa, ma più una trappola del carburante. Significa che, nell'asse della distanza (asse X), andrai molto più lentamente piuttosto che su una strada piana. Quindi questa categoria ti aiuterà ad anticipare quelle salite e raggiungere il prossimo serbatoio del carburante.
| Fuel position | Fuel location
(in meters) |
Gap between
2 fuels (in meters) |
Difficulties | ||
|---|---|---|---|---|---|
| Logs locations
(in meters) |
Caves locations
(in meters) |
Suddenly climbs
location (in meters) | |||
| Start | Full tank | ||||
| 1st | 150 | 150 | |||
| 2nd | 251 | 101 | |||
| 3rd | 353 | 102 | |||
| 4th | 450 | 97 | |||
| 5th | 602 | 152 | |||
| 6th | 751 | 149 | |||
| 7th | 916 | 165 | Type-A (/) (1,090) | ||
| 8th | 1,157 | 251 | |||
| 9th | 1,360 | 203 | |||
| 10th | 1,562 | 202 | |||
| 11th | 1,799 | 237 | |||
| 12th | 2,075 | 376 | |||
| 13th | 2,335 | 260 | |||
| 14th | 2,583 | 248 | Type-A (DQ) (2,625) | ||
| 15th | 2,890 | 307 | |||
| 16th | 3,224 | 334 | |||
| 17th | 3,556 | 332 | |||
| 18th | 3,906 (before a
"stop-log") |
350 | (/) (4,191) | ||
| 19th | 4,301 | 395 | (/) (4,496) | ||
| 20th | 4,672 | 371 | 4,800 | ||
| 21st | 5,102 (in a cave) | 430 | Type-B (/) (5,325) | ||
| 22nd | 5,536 (climbing) | 434 | Type-B (DQ) (5,607)
Type-D (5,770) |
||
| 23rd | 5,996 (climbing) | 460 | 6,195 | ||
| 24th | 6,422 (on a rock) | 426 | Type-C (DQ) (6,700) | ||
| 25th | 6,870
(stiff downhill) |
448 | (/) (7,285) | ||
| 26th | 7,320 (in a cave;
at the bottom) |
450 | 7,460 | ||
| 27th | 7,773 | 453 | Type-C (DQ) (7,905)
Type-C (/) (8,042) Type-D (8,195) |
||
| 28th | 8,353 (after a
"stop-log") |
580 | (/) (8,835) | ||
| 29th | 8,868 (in a cave;
at the bottom) |
515 | |||
| 30th | 9,378 | 510 | Type-D (9,889) | ||
| 31st | 9,977 | 599 | Type-C (DQ) (10,076) | (DQ) (10,389)
(DQ) (10,523) |
|
| 32nd | 11,136 (downhill) | 1,169 | (/) (11,552) | ||
| 33rd | 11,701 | 565 | |||
| 34th | 12,301 | 600 | (DQ) (12,425) | ||
| 35th | 12,887 | 586 | 13,418 | ||
| 36th | 13,517
(stiff downhill) |
630 | (/) (13,574)
(DQ) (14,103) |
||
| 37th | 14,207 | 690 | |||
| 38th | 14,870 (downhill) | 663 | (DQ) (15,229) | ||
| 39th | 15,569 (climbing) | 699 | Type-C (DQ) (15,953)
Type-C (DQ) (16,287) |
(/) (15,803) | 15,640 |
| 40th | 16,304 (floating
over the mud lake) |
735 | Type-C (DQ) (16,671)
Type-C (DQ) (16,945) |
||
| 41st | 17,064 | 760 | Type-C (DQ) (17,171) | (DQ) (17,525)
(DQ) (17,691) |
|
| 42nd | 17,796 | 732 | (/) (17,834) | ||
| 43rd | 18,564 (downhill) | 768 | Type-C (DQ) (18,589) | (/) (18,807)
(/) (19,176) |
|
| 44th | 19,324 | 760 | Type-D (19,694) | ||
| 45th | 20,133 | 809 | Type-C (DQ) (20,511)
Type-D (20,695) |
(DQ) (20,336) | |
| 46th | 20,963 | 830 | (/) (21,698) | ||
| 47th | 21,809 | 846 | |||
| 48th | 22,645 | 836 | (/) (22,954) | ||
| 49th | 23,473 | 828 | Type-D (23,811) | ||
| 50th | 24,376 | 903 | 25,032 | ||
| 51st | 25,225 | 849 | Type-D (25,705)
Type-D (25,912) |
25,474 | |
| 52nd | 26,151 (climbing) | 926 | Type-D (26,267) | (DQ) (27,006) | |
| 53rd | 27,088 | 937 | 27,872 | ||
| 54th | 28,011 | 923 | 28,346
28,830 | ||
| 55th | 28,914
(stiff downhill) |
903 | Type-D (29,566) | 29,017 | |
| 56th | 29,858 | 944 | Type-D (30,010) | ||
| 57th | 30,871 | 1,013 | Type-D (31,343) | (DQ) (31,138) | |
| 58th | 31,910 (downhill) | 1,039 | Type-D (32,238) | (/) (31,942)
(/) (32,776) |
|
| 59th | 32,875 | 965 | Type-C (DQ) (33,166)
Type-C (DQ) (33,632) |
33,788 | |
| 60th | 33,852
(top of a hill) |
977 | |||
| 61st | 34,886 | 1,034 | (/) (35,329)
(DQ) (35,506) (/) (35,668) |
||
| 62nd | 35,929 | 1,043 | Type-C (DQ) (36,228) | (DQ) (36,435) | |
| 63rd | 36,977 (climbing) | 1,048 | Type-C (DQ) (37,646) | (/) (37,464)
(DQ) (37,801) |
|
| 64th | 38,067 | 1,090 | Type-D (38,822)
Type-D (39,986) |
(DQ) (39,175) | 38,130
38,581 |
| 65th | 40,266 | 2,199 | Type-D (40,376)
Type-C (DQ) (41,217) Type-D (41,365) |
(/) (41,031) | |
| 66th | 41,453 | 1,187 | (/) (41,530)
(DQ) (41,673) |
42,123 | |
| 67th | 42,556 (downhill) | 1,103 | |||

Beach
| Fuel position | Fuel location
(in meters) |
Gap between
2 fuels (in meters) |
|---|---|---|
| Start | Full tank | |
| 1st | ||
| 2nd | ||
| 3rd | ||
| 4th | ||
| 5th | ||
| 6th | ||
| 7th | ||
| 8th | ||
| 9th | ||
| 10th | ||
| 11th | ||
| 12th | ||
| 13th | ||
| 14th | ||
| 15th | ||
| 16th | ||
| 17th | ||
| 18th | ||
| 19th | ||
| 20th | ||
| 21st | ||
| 22nd | ||
| 23rd | ||
| 24th | ||
| 25th | ||
| 26th | ||
| 27th | ||
| 28th | ||
| 29th | ||
| 30th | ||
| 31st | ||
| 32nd | ||
| 33rd | ||
| 34th | ||
| 35th | ||
| 36th | ||
| 37th | ||
| 38th | ||
| 39th | ||
| 40th | ||
| 41st | ||
| 42nd | ||
| 43rd | ||
| 44th | ||
| 45th | ||
| 46th | ||
| 47th | ||
| 48th | ||
| 49th | ||
| 50th |

Racer Glacier
| Fuel position | Fuel location
(in meters) |
Gap between
2 fuels (in meters) |
|---|---|---|
| Start | Full tank | |
| 1st | 150 | 150 |
| 2nd | 330 | 180 |
| 3rd | 460 | 130 |
| 4th | 630 | 160 |
| 5th | 840 | 210 |
| 6th | 1050 | 210 |
| 7th | 1,250 | 200 |
| 8th | 1,500 | 250 |
| 9th | 1,600 | 100 |
| 10th | 1,750 | 150 |
| 11th | 2,040 | 290 |
| 12th | 2,280 | 240 |
| 13th | 2,590 | 210 |
| 14th | 2,890 | 300 |
| 15th | 3,180 | 290 |
| 16th | 3,540 | 360 |
| 17th | 3,940 | 400 |
| 18th | 4,240 | 300 |
| 19th | 4,640 | 400 |
| 20th | 5,040 | 400 |
| 21st | 5,520 | 480 |
| 22nd | 5,940 | 420 |
| 23rd | 6,350 | 410 |
| 24th | 6,840 | 590 |
| 25th | 7,360 | 520 |
| 26th | 7,560 | 200 |
| 27th | 7,900 | 340 |
| 28th | 8,400 | 500 |
| 29th | 8,900 | 500 |
| 30th | 9,400 | 500 |
| 31st | 9,990 | 590 |
| 32nd | 105?? | ??? |
| 33rd | ||
| 34th | ||
| 35th | ||
| 36th | ||
| 37th | ||
| 38th | ||
| 39th | ||
| 40th | ||
| 41st | ||
| 42nd | ||
| 43rd | ||
| 44th | ||
| 45th | ||
| 46th | ||
| 47th | ||
| 48th | ||
| 49th | ||
| 50th |

Backwater Bog
| Fuel position | Fuel location
(in meters) |
Gap between
2 fuels (in meters) |
|---|---|---|
| Start | Full tank | |
| 1st | ||
| 2nd | ||
| 3rd | ||
| 4th | ||
| 5th | ||
| 6th | ||
| 7th | ||
| 8th | ||
| 9th | ||
| 10th | ||
| 11th | ||
| 12th | ||
| 13th | ||
| 14th | ||
| 15th | ||
| 16th | ||
| 17th | ||
| 18th | ||
| 19th | ||
| 20th | ||
| 21st | ||
| 22nd | ||
| 23rd | ||
| 24th | ||
| 25th | ||
| 26th | ||
| 27th | ||
| 28th | ||
| 29th | ||
| 30th | ||
| 31st | ||
| 32nd | ||
| 33rd | ||
| 34th | ||
| 35th | ||
| 36th | ||
| 37th | ||
| 38th | ||
| 39th | ||
| 40th | ||
| 41st | ||
| 42nd | ||
| 43rd | ||
| 44th | ||
| 45th | ||
| 46th | ||
| 47th | ||
| 48th | ||
| 49th | ||
| 50th |

Patchwork Plant
Occupational health and safety?
What is it?
Extreme difficult route. On the back the background shows conveyors with details:Fast and furios, control in the air,accelerator-FLIC FLAC, Enhanced turbo and coin-operated accelerator; as well as claws.
On the highway there are some obstacles:
Levers:Touch the lever—the patchwork plant is switched on or robots is this factory.
Conveyors:speed up or slow down the machine depending on which way they go.
Boxes:They fall or move along conveyors. Similar boxes can be found on the highway stagnant swamp. These boxes can be destroyed or dentend by machines or robots.
Gears:Round obstacles that don't cause much difficulty if they don't hang in the air. Often meet.
Robots: They are activated by black and yellow levers. A very difficult obstacle that raises and lowers the hands with the load. It can crush a car or crates.
Magnets: Tĥere are two types of magnets.
Type A: Hanging at the top, pulling the car up. You can turn it turning the lever or touching it.
Type B: The same, only hanging at the bottom.
| Fuel position | Fuel location
(in meters) |
Gap between
2 fuels (in meters) |
|---|---|---|
| Start | Full Tank | |
| 1st | 150 | 150 |
| 2nd | 210 (This fuel is only a available if you take the upper route) | 60 |
| 3rd | 470 | 260 |
| 4th | 630 | 160 |
| 5th | 830 | 200 |
| 6th | 1,020 | 190 |
| 7th | 1,350 | 320 |
| 8th | 1,610 | 260 |
| 9th | 1,890 | 280 |
| 10th | 2,160 | 270 |
| 11th | 2,460 | 300 |
| 12th | 2,780 | 320 |
| 13th | 3,120 | 340 |
| 14th | 3,420 | 300 |
| 15th | 3,770 | 350 |
| 16th | 4,180 | 410 |
| 17th | 4,530 | 350 |
| 18th | 4,980 | 450 |
| 19th | 5,450 | 470 |
| 20th | 5,860 | 410 |
| 21st | 6,310 | 450 |
| 22nd | 6,760 | 450 |
| 23rd | 7,210 | 450 |
| 24th | 7,710 | 500 |
| 25th | 8,330 | 620 |
| 26th | 8,810 | 480 |
| 27th | 9,310 | 500 |
| 28th | 9,880 | 570 |
| 29th | 10,470 | 590 |
| 30th | 11,060 | 590 |
| 31st | 11,640 | 580 |
Sky Rock Outpost
| Fuel position | Fuel location
(in meters) |
Gap between
2 fuels (in meters) |
|---|---|---|
| Start | Full tank | |
| 1st | 150 | 150 |
| 2nd | 300 | 150 |

.png)