Albert 1269 (talk | contribs) m (Are you sure) Tag: Visual edit |
No edit summary |
||
| Line 1: | Line 1: | ||
{{Stub}} |
{{Stub}} |
||
[[File:Distanceheader.png|center|424x424px]] |
[[File:Distanceheader.png|center|424x424px]] |
||
| − | '''Adventure''' mode is the |
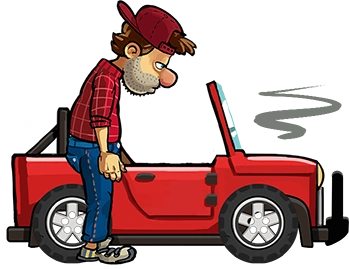
+ | '''Adventure''' mode is the “Old School” Hill Climb Racing mode. Here you can test your skills in your favourite vehicles and see how far you can go without crashing or running out of fuel. Do you have what it takes to earn a place on the leaderboards? Play with the best players in the world! |
==Fuel== |
==Fuel== |
||
Revision as of 21:32, 18 January 2022
| This article is a stub. You can help Hill Climb Racing 2 Wiki by expanding it. |

Adventure mode is the “Old School” Hill Climb Racing mode. Here you can test your skills in your favourite vehicles and see how far you can go without crashing or running out of fuel. Do you have what it takes to earn a place on the leaderboards? Play with the best players in the world!
Fuel
In adventure mode, fuel (and battery, since the 1.46.0 update) management plays a key role in how far you can drive.
As you drive, your fuel gauge will slowly run out (remember that the vehicles all have different sized fuel tanks, and CC-EV's battery size is different.)
When you run out of fuel, you will roll to a stop and it's game over - but you can extend your run by collecting the red fuel canisters to refill your fuel along the way. You can also extend the run by using Landing Boost, Jump Shocks, and Wings.
As you progress through the adventure maps, the fuel tanks get further and further away. If you have the "Magnet" tuning part equipped, you can collect fuel tanks without driving through its path.
Note: Equipping the Tuning Part Afterburner on a vehicle will increase the fuel consumption when accelerating. The same occurs when you equip the thrusters and use them!
Coins

You can collect coins during your adventure run that will allow you to purchase additional vehicles, adventures, upgrades and other goodies.
There are also two kinds of special bags of coins which you gain the first time you reach a distance milestone:
1) "Overall best distance" (OBD) bags:
The first time you explore new territories on any map, no matter what vehicle you use, you collect OBD bags along your route, at 200 to 250m intervals. These OBD bags can only be gained once per map, so the only way to continue to get them is to beat your old overall records. Metrics: the first OBD bag (~200m from the start) gives you 1,000 coins, then subsequent bags contain an incremental amount of 50 coins, i.e. 1,050 coins at ~400m, 1,100 coins at ~600m, etc. The reward is capped at 3,000 coins per OBD bag.
2) "Vehicle-specific" (VS) bags (since V.1.23):
The first time you explore new territories on any map, with any vehicle, you collect VS bags along your route, at 200 to 250m intervals. These VS bags can only be gained once per map/vehicle combination. Once you have played a particular adventure map with all available vehicles, the only way to continue to get VS bags is to beat your old vehicle-specific records. Metrics: the first VS bag (~200m from the start) gives you 100 coins, then subsequent bags contain an incremental amount of 10 coins, i.e. 110 coins at ~400m, 120 coins at ~600m, etc. The reward is capped at 300 coins per VS bag.
Remark: The first time you explore new territories, you will not be able to collect both OBD and VS bags at the same time. The priority order is 1-OBD bags; 2-VS bags.
Example: You play Countryside with the Rally Car. In the past, you set your personal best at 6,000m, so you already collected OBD bags till 6,000m. Now you will collect Rally-specific VS bags till 6,000m. From 6,000m onwards, you will collect OBD bags instead (the VS bags collection will stop). Next time you get past 6,000m with the Rally Car, you will get the VS bags you "missed" the first time, until you reach your overall best.
At the least, the adventure map "Gloomvale" has a different distance bag system than the other maps. This map's OBD bags start at 500 coins and add an additional 25 coins for every next bag. VS bags in this map start at 70 coins and add an additional 7 coins for every next bag.
Gloomvale has many different maps, so you will need to know that the bags are set for every different map.
Example: You got 1000m on one Gloomvale map. You would have collected all the OBD bags up to that point, and potentially the VS bags. The next map you play on Gloomvale will have the OBD and VS bags on it for you to collect, since the map is different. You can do this on all maps until you have played every map twice or more.
Additionally, with the 1.36 Update, you are given the opportunity to double all coins you collect in a try on the adventure map when trying to enter the corresponding map. For doubling the coins you either need to watch an ad or you can skip it with the VIP Subscription. Remember that all ads/VIP skips are limited uses per day. Only use 2x if you are planning on getting far and collecting the coins. After you finish the run, your gained coins will be shown at the left with a "2x" icon, which confirms that your coins have been doubled. The Double coins does not double the stunts' coins, but only the collected coins.
Adventure Tasks
Every so often you will see a blue chest icon pop up on a randomly selected adventure map in the top of the "Adventure" screen, next to the Adventure Rank. These are adventure tasks - randomly generated, optional challenges that will reward you with a bonus chest. This chest’s contents will become progressively better as you reach further distance milestones.
The Adventure task will either not have a specific vehicle chosen or show a particular vehicle. No vehicle indicates that you can use a vehicle of your choosing. If it shown with a specific vehicle, you must use that vehicle to gain the reward chest (for example: if the icon is of the Rally Car, that means you must use the Rally Car). If you do not own that particular vehicle, or do not want to use it, press the "Reset" button in the corner of the adventure map. The Reset button appears once a day. Tap that and the task will be deleted & a new one will be assigned in its place.
The Chest level is increased one by one in 500 meter increments as you progress. The higher the chest, the better the rewards. For the hard maps, (Forest Trials, Intense City and Raging Winter) you get one level chest per 100 meters.
Note: If you decide to restart after leveling up your chest, it will stay that level until you reach the level 1 distance mark. If you game over before getting a level 1 chest, you can press "Retry" and you will have another opportunity to try for it again. If you press "Next," you will lose the task with no rewards. If you encounter this on a special map (requires ticket), you cannot retry the task if you mess up.
Adventurer Level
Since the Update 1.37.0 there are Adventurer Levels. You will travel from Wanderer to Canyoneer by driving maps with specific vehicles. You can increase them by driving with the different vehicles on the different adventure maps to collect stars. For the normal tracks you can gain up to 10,000 stars with each vehicle, which is equal to 10,000 m, so you gain one star per meter. For the special adventure maps you can gain stars up until 5,000 m, but the special thing there is that one meter doesn't give you one but three stars, so the maximum amount of stars you can gain for each vehicle is 15,000 stars (except for Sky Rock Outpost, this adventure map's star collection works as for the normal adventure maps). Therefore those maps are very hard to play through though.
The maximum stars per regular map and Sky Rock Outpost is currently 230,000. On the 3 hard maps, max. is 345,000. This will help calculate the max. adventure rank for a player.
You can see your adventurer level in the "Adventure" tab at the top of your screen, next to the Adventure tasks or randomly selected map.
Below is a list of the ranks, how many stars you need and what you gain by reaching.
| Class | Rank | Needed Stars | Adventure Track
Unlocked |
Hat
Unlocked |
|---|---|---|---|---|
| Wanderer | Scout | 0+ | Countryside | |
| Second Class | 1,000+ | Forest | Forest Crown | |
| First Class | 4,000+ | City | Trash Helmet | |
| Explorer | Scout | 10,000+ | Sky Rock Outpost | Cheese Hat |
| Second Class | 20,000+ | Mountain | Mountain Hat | |
| First Class | 35,000+ | Rustbucket Reef | Octo Hat | |
| Trailblazer | Scout | 50,000+ | Winter | Snowman Helmet |
| Second Class | 100,000+ | Mines | Mine Hat | |
| First Class | 200,000+ | Desert Valley | Cactus Helmet | |
| Ranger | Scout | 250,000+ | Beach | Leafy Hat |
| Second Class | 350,000+ | Backwater Bog | Gator Helmet | |
| First Class | 500,000+ | Racer Glacier | Yeti Hat | |
| Vanguard | Scout | 600,000+ | Patchwork Plant | Welder Helmet |
| Second Class | 650,000+ | Gloomvale | Gloomvale Wreath | |
| First Class | 750,000+ | |||
| Canyoneer | 1,000,000+ | Legendary Chest | Canyoneer Crown |
You can see the image of each adventure hat here
For every additional 50,000 stars after reaching the adventure rank Canyoneer you reach a new Canyoneer Level, such as Canyoneer 2, 3, and so on. Each time you rank up from Canyoneer on you will be given a legendary chest.
List of Adventure Tracks
You can find a description of each map here. You can unlock a map with ![]() or by reaching an adventurer level.
or by reaching an adventurer level.
| Name | Background Picture | Coins to unlock | Rank to unlock | Description |
|---|---|---|---|---|
| Countryside | 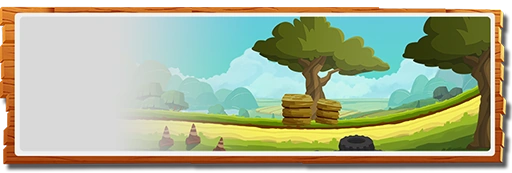
|
Free | Zero | The perfect place to start exploring the wonders of long distance travel. Are we there yet? |
| Forest | 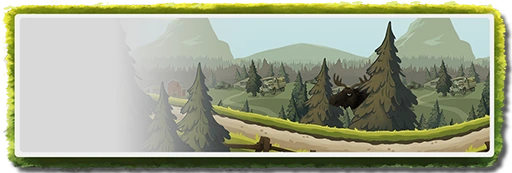
|
40,000 |
Wanderer Second-class (1,000+) | Experience the peace and quiet of a national forest. With a race car! |
| City | 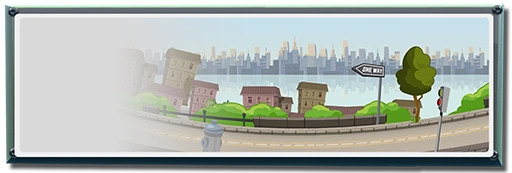
|
120,000 |
Wanderer First-class (4,000+) | Bill's favorite city neighborhood with tricky jumps and obstacles. |
| Mountain | 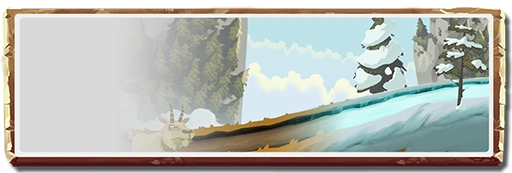
|
300,000 |
Explorer Second-class (20,000+) | This track has its ups and downs. How many mountains can you conquer? |
| Rustbucket Reef | 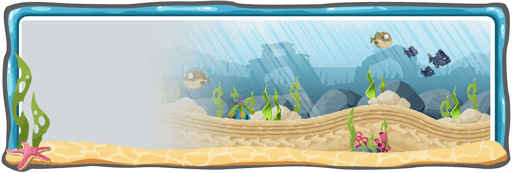
|
350,000 |
Explorer First-class (35,000+) | Explore the mysterious sunken depths of the Rustbucket Reef. Take a deep breath! |
| Winter | 
|
400,000 |
Trailblazer Scout (50,000+) | The perfect place to start exploring the wonders of long distance travel. Are we there yet? |
| Mines | 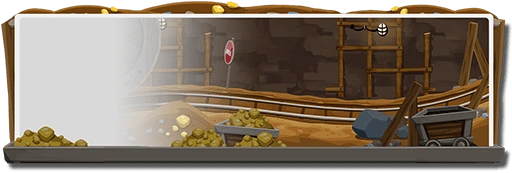
|
500,000 |
Trailblazer Second-class (100,000+) | Venture down the mines. Who knows what kind of treasures lie down there? |
| Desert Valley | 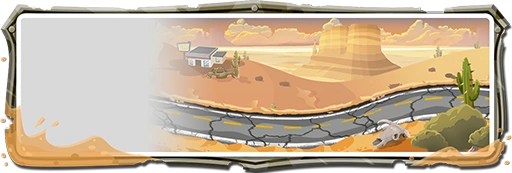
|
600,000 |
Trailblazer First-class (200000+) | Bill's got a long road ahead. Hopefully he wears enough sunblock! |
| Beach | 
|
700,000 |
Ranger Scout (250,000+) | Pack your towel and swimming suit. Bill's heading to the Beach! |
| Backwater Bog | 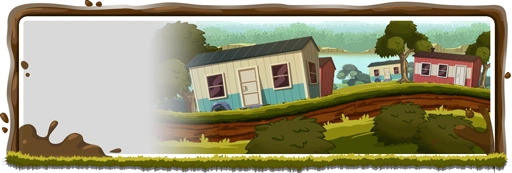
|
800,000 |
Ranger Second-class (350,000+) | Conquer the muddy slopes, smash through the trash and dodge the alligators of the Backwater Bog. |
| Racer Glacier | 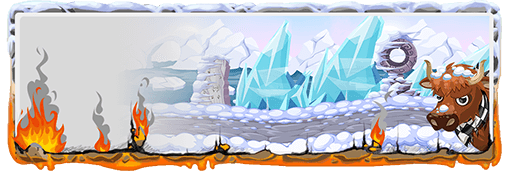
|
800,000 |
Ranger First-class (500,000+) | Brave the winds, avoid the geysers, keep out of the lava and watch out for dinosaurs as you uncover the mystery of the ancient Racer Glacier! |
| Patchwork Plant | 800,000 |
Vanguard Scout (600,000+) | Occupational Health & Safety? What's that? | |
| Gloomvale | 
|
1,000,000 |
Vanguard Second-Class (650,000+) | Don't get lost in this ever-changing forest. |
Special maps
Here you have limited tries per day. Each try costs one red ticket and you have 4 which refill every 24 hours. On all except Sky Rock Outpost, for each new meter you get 3 stars for the adventurer level. To have access to this maps you need to gain enough stars in chosen adventure maps.
| Name | Background Picture | Requirements to unlock | Description |
|---|---|---|---|
| Sky Rock Outpost | 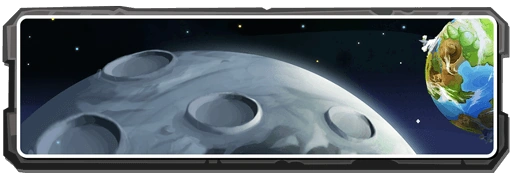
|
Explorer Scout
or alternatively 200,000 |
Journey through space and set your tires upon the unknown territory of the moon! |
| Forest Trials | 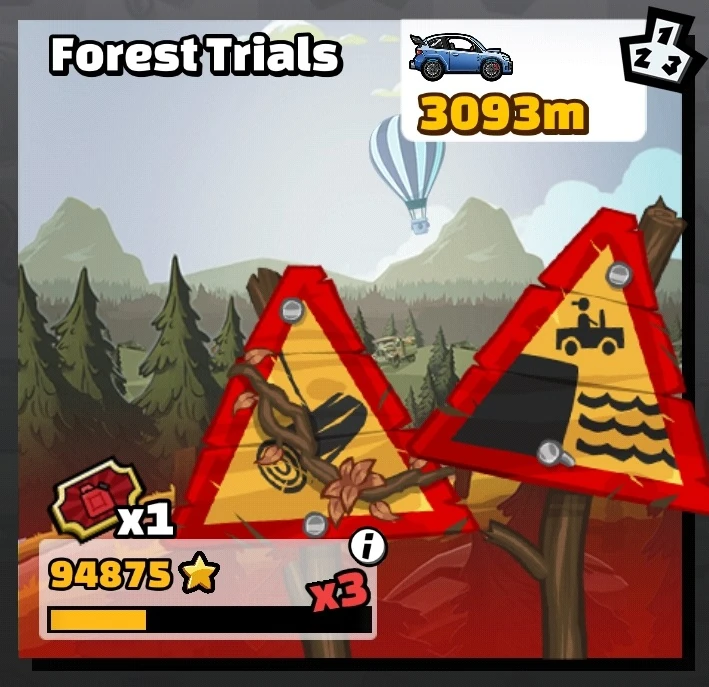
|
40,000+ stars in Forest | A true test of skills awaits those who challenge these perilous trials |
| Intense City | 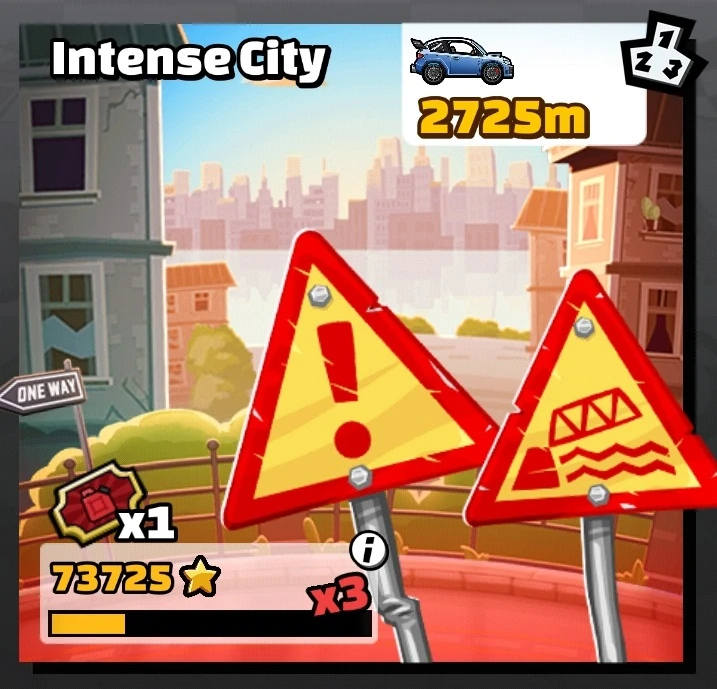
|
30,000+ stars in City | The ultimate balancing act between grippy tarmac and slippery girders |
| Raging Winter | 
|
30,000+ stars in Winter | Battle against the blizzards and the bergy bits |
Adventure Tracks Analytics
Here are some tables that summarize what you can find in each map, especially fuel locations, several difficulties, etc. This topic was essentially made to help people get a better personal best record in their adventure maps, with all the information they need, without spending a lot of time watching videos on YouTube or in-game replays. You can now anticipate what's next after your personal best!!!
Note: Tables contain the 3 next fuels after the current WR (all vehicles).
Normal Maps
Countryside
Countryside adventure starts very flat and has a lot of bridges (you gain speed if taken well), but the longer distance you reach, the more of a bumpy road you will see, with a lot of irregular climbs and downhills. Barns will also begin to appear sometimes with the first one at 3227m. Here is a summarized list of all fuel locations and biggest difficulties (who are described below) in Countryside.
Difficulties:
- Barns: Dangerous places for high height vehicles! You must drive carefully if having this type of vehicle!
- Climbs: They can have several difficulties, which are essentially determined by the steepness:
- Medium
- Hard
- Very Hard
| Fuel position | Fuel location
(in meters) |
Gap between
2 fuels (in meters) |
Difficulties | |
|---|---|---|---|---|
| Barn location
(in meters) |
Medium, Hard and Very Hard Climbs
(in meters (from start to end)) | |||
| Start | Full tank | |||
| 1st | 150 | 150 | ||
| 2nd | 300 | 150 | ||
| 3rd | 450 | 150 | ||
| 4th | 600 | 150 | ||
| 5th | 800 | 200 | ||
| 6th | 1,000 | 200 | ||
| 7th | 1,200 | 200 | ||
| 8th | 1,450 (bridge) | 250 | ||
| 9th | 1,700 | 250 | ||
| 10th | 1,950 | 250 | ||
| 11th | 2,250 | 300 | Medium (2,117->2,150) | |
| 12th | 2,550 | 300 | Medium (2,715->2,734) | |
| 13th | 2,850 | 300 | Medium (3,125->3,142) | |
| 14th | 3,150 (bridge) | 300 | 3,227
3,449 |
|
| 15th | 3,500 | 350 | 3,741
3,846 |
Medium (3,725->3,741) |
| 16th | 3,850 (barn) | 350 | 4,179 | Medium (3,883->3,898) |
| 17th | 4,200 (after barn) | 350 | 4,367 | Hard (4,347->4,367) |
| 18th | 4,600 | 400 | 4,676 | Medium (4,626->4,652)
Medium (4,753->4,773) |
| 19th | 5,000 (before barn) | 400 | 5,007 | Medium (5,125->5,139) |
| 20th | 5,400 (bridge) | 400 | 5,315
5,629 5,768 |
|
| 21st | 5,850 (bridge) | 450 | Hard (5,983->6,003) | |
| 22nd | 6,300 (after a
downhill) |
450 | Medium (6,372->6,396)
Medium (6,476->6,528) | |
| 23rd | 6,750(climbing) | 450 | Medium (6,856->6,891)
Hard (6,986->7,031) | |
| 24th | 7,200 (climbing) | 450 | 7,266
7,348 7,425 |
Medium (7,339->7,347)
Very Hard (7,526->7,554) Hard (7,676->7,732) |
| 25th | 7,700 (climbing) | 500 | 7,835 | Hard (7,820->7,833)
Medium (8,062->8,091) Hard (8,110->8,129) |
| 26th | 8,200 (bridge) | 500 | 8,478 | Very Hard (8,221->8,273)
Medium (8,393->8,420) Hard (8,613->8,642) |
| 27th | 8,700 (downhill) | 500 | 9,197 | Medium (8,751->8,827)
Hard (8,909->8,964) |
| 28th | 9,250 (downhill) | 550 | Very Hard (9,283->9,317)
Very Hard (9,437->9,479) Medium (9,559->9,589) Hard (9,685->9,702) Hard (9,777->9,836) | |
| 29th | 9,800 (climbing) | 550 | Very Hard (9,959->9,993)
Medium (10,108->10,152) | |
| 30th | 10,350 (climbing) | 550 | 10,817
10,923 |
Hard (10,500->10,558)
Hard (10,626->10,692) Medium (10,762->10,817) |
| 31st | 10,950 (after barn) | 600 | 11,025 | Hard (11,001->11,025)
Very Hard (11,162->11,195) |
| 32nd | 11,550 (bridge) | 600 | 11,640 | Medium (11,565->11,597)
Hard (11,695->11,741) Hard (11,854->11,895) |
| 33rd | 12,150 (after a
bridge; climbing) |
600 | 12,439
12,707 |
Hard (12,245->12,305)
Very Hard (12,382->12,439) Medium (12,542->12,592) |
| 34th | 12,750 | 600 | 12,906
13,199 |
Very Hard (12,783->12,809)
Very Hard (12,931->12,989) |
| 35th | 13,400 (downhill) | 650 | 13,412 | Hard (13,467->13,498)
Hard (13,639->13,683) Hard (13,991->14,056) |
| 36th | 14,050 (climbing) | 650 | Very Hard (14,127->14,172)
Medium (14,515->14,581) Hard (14,651->14,720) | |
| 37th | 14,700 (climbing) | 650 | Hard (14,833->14,878)
Hard (15,177->15,217) Very Hard (15,338->15,390) | |
| 38th | 15,400 (bridge) | 700 | Medium (15,468->15,534)
Hard (15,729->15,781) Very Hard (15,860->15,907) Hard (16,031->16,060) | |
| 39th | 16,100
(after a bridge) |
700 | ||

Forest
Forest adventure is one of the easiest, because you can reach high distances with pretty low power vehicles. It is the best adventure map for beginners who want to do a lot of kilometers or for earning coins. This adventure isn't as bumpy as the Countryside adventure (for example) but has a lot of regular climbs and downhills (Note: those won't be described below because they are repetitive); so you must pass them very well to have a chance to reach the next canister when driving at high distances. This adventure doesn't have big traps, because they can be easily passed with a good management of your vehicle. However, be careful of the logs which are almost everywhere on the map; it's the typical obstacle that can ruin your run. Watch out for Bill's head when driving near these obstacles. Here is a summarized list of all fuel locations and biggest difficulties (which are described blow) in Forest.
Difficulties:
- Ground logs: These logs will slow your vehicle down majorly and could cause it to lose control. Vehicles can also get stuck in them.
- Hanging logs: These logs aren't moving or above a water hole, but they can cause a vehicle to crash into them.
- Water Jumps: These jumps are dangerous, because if you fail one of them and dive in the water hole, you will die! Two types of jumps can be distinguished:
- Type-A: A big log held by two ropes which is standing over the water hole to help you go over it.
- Type-B: A small log held by only one rope (fixation point is at the center of the log) which is standing over the water hole to help you go over it. Be careful: the log could rotate around itself!
- Swinging Logs: Sometimes, swinging logs may appear. They are usually swinging backwards and forwards. Two types of logs can be distinguished:
- Type-1: The log is swinging near the ground. You can easily pass them if you take the small jump before it correctly.
- Type-2: The log is swinging in the air. Be careful with high height vehicles if you drive one of them!
| Fuel position | Fuel location
(in meters) |
Gap between
2 fuels (in meters) |
Difficulties | |
|---|---|---|---|---|
| Water Jumps
location (in meters) |
Swinging Logs
location (in meters) | |||
| Start | Full tank | |||
| 1st | 170 | 170 | ||
| 2nd | 290 | 120 | ||
| 3rd | 410 | 120 | ||
| 4th | 530 | 120 | ||
| 5th | 660 | 130 | ||
| 6th | 780 (downhill) | 120 | ||
| 7th | 900 | 120 | ||
| 8th | 1,080 (downhill) | 180 | ||
| 9th | 1,260 | 180 | Type-2 (1,281) | |
| 10th | 1,440 | 180 | ||
| 11th | 1,620 (log zone;
at the bottom) |
180 | ||
| 12th | 1,800 (climbing) | 180 | ||
| 13th | 2,000 | 200 | ||
| 14th | 2,180 (climbing) | 180 | ||
| 15th | 2,420 | 240 | ||
| 16th | 2,660 | 240 | Type-2 (2,768) | |
| 17th | 2,910 (downhill) | 250 | ||
| 18th | 3,150 (log zone;
at the bottom) |
240 | ||
| 19th | 3,390 | 240 | ||
| 20th | 3,640 | 250 | ||
| 21st | 3,910 (log zone) | 270 | ||
| 22nd | 4,240 | 330 | ||
| 23rd | 4,540 (downhill) | 300 | Type-A (4,672) | |
| 24th | 4,830 (log zone;
slow down!) |
290 | ||
| 25th | 5,150 | 320 | Type-2 (5,411) | |
| 26th | 5,450 (downhill) | 300 | Type-1 (5,703) | |
| 27th | 5,750 (downhill) | 300 | Type-1 (6,060) | |
| 28th | 6,110 | 360 | ||
| 29th | 6,480 | 370 | ||
| 30th | 6,830 | 350 | ||
| 31st | 7,180 | 350 | ||
| 32nd | 7,560 | 380 | ||
| 33rd | 7,910 | 350 | ||
| 34th | 8,290 | 380 | ||
| 35th | 8,690 | 400 | ||
| 36th | 9,140 | 450 | ||
| 37th | 9,510 | 350 | ||
| 38th | 9,980 | 470 | ||
| 39th | 10,390 | 410 | ||
| 40th | 10,810 | 420 | ||
| 41st | 11,300 | 490 | ||
| 42nd | 11,780 | 480 | ||
| 43rd | 12,280 | 500 | ||
| 44th | 12,780 | 500 | ||
| 45th | 13,250 | 470 | ||
| 46th | 13,740 | 490 | ||
| 47th | 14,210 | 470 | ||
| 48th | 14,780 | 560 | ||
| 49th | 15,320 | 540 | ||
| 50th | 15,860 | 540 | ||
| 51st | 16,400 | 540 | ||
| 52nd | 16,950 | 550 | ||
| 53rd | 17,520 | 570 | ||
| 54th | 18,050 | 530 | ||
| 55th | 18,660 | 610 | ||
| 56th | 19,270 | 610 | ||
| 57th | 19,880 | 610 | ||
| 58th | 20,450 | 570 | ||
| 59th | 21,080 | 630 | ||
| 60th | 21,670 | 590 | ||
| 61st | 22,330 | 660 | ||
| 62nd | 22,980 | 650 | ||
| 63rd | 23,650 | 670 | ||
| 64th | 24,320 | 670 | ||
| 65th | 24,970 | 650 | ||
| 66th | 25,650 | 680 | ||
| 67th | 26,310 | 660 | ||
| 68th | 27,030 | 720 | ||
| 69th | 27,730 | 700 | ||
| 70th | 28,470 | 740 | ||
| 71st | 29,200 | 730 | ||
| 72nd | 29,930 | 730 | ||
| 73rd | 30,670 | 740 | ||
| 74th | 31,400 | 730 | ||
| 75th | 32,170 | 770 | ||
| 76th | 32,950 | 780 | ||
| 77th | 33,700 | 750 | ||
| 78th | 34,520 | 820 | ||
| 79th | 35,300 | 780 | ||
| 80th | 36,080 | 780 | ||
| 81st | 36,870 | 790 | ||
| 82nd | 37,730 | 860 | ||
| 83rd | 38,570 | 840 | ||
| 84th | 39,400 | 830 | ||
| 85th | 40,250 | 850 | ||
| 86th | 41,090 | 840 | ||
| 87th | 41,930 | 840 | ||
| 88th | 42,840 | 910 | ||
| 89th | 43,740 | 900 | ||

City
This track is a decent choice for those who prefer asphalt racing. You can also go fast in this track. Be careful however, because in the city, there are lots of dangerous obstacles (they are listed below). Some are rather easy, others may be more difficult (a fast vehicle is recommended). Down below you’ll also find the locations of fuel pickups.
Difficulties
- Pitfalls: Gaps filled with water. Falling into them will lead to an instant death. They all have something to help you jump across. Note: There are waterless ones occupied by ship containers. Those don’t result in an instant game over and you can possibly escape them.
- Draw Bridges: Bascule draw bridges that are constantly opening over water-filled pitfalls. These are rather easy to overcome: simply drive fast as you go across them (although not all of them are like that).
- Type 1: Both ends are going up and down. Rather easy to over come.
- Type 2: Only has 1 side. Just as easy as Type 1, except for if it's lower than the other side.
- Type 3: Will lead you to drive on hanging iron beams or hanging ship containers. Some may have an opposite end.
- Iron Beams: Found hanging over water. The position you land on them plays an important role because they will move. If you’re not careful, it could send you into a pitfall of water, thus resulting in a game over.
- Type 1: Hangs by 1 rope. It can move depending on where you land on it.
- Type 2: Hangs by 2 ropes. More stable than Type 1.
- Ship containers: Scattered across the track. They are an obstacle, especially for high-height vehicles. They can also be moved if they are hit hard enough or have a spot hanging in the air and it makes contact with the vehicle. (Note: There is a bug where the wheels may clip through the top of the container).
- Type 1: Simply stands on the ground. They don’t really pose a threat, but can be an issue for high-height vehicles.
- Type 2: A group of containers, stacked on each other. They may either be stacked well or unevenly.
- Type 3: Containers that form bridges over waterless pitfalls (as mentioned earlier, these pitfalls here aren’t instant kill zones, and the player can possibly get out of them). You might only see them at 1000m and 1100m. Since these containers tend to hang over air, they are easier to cause to move than the ones completely on the ground.
- Type 4: These containers hang on ropes over water. Just like the iron beams, they can tip depending on where the vehicle lands. None of them hang by 2 ropes.
| Fuel position | Fuel location
(in meters) |
Gap between
2 fuels (in meters) |
|---|---|---|
| Start | Full tank | |
| 1st | 160 | 160 |
| 2nd | 300 | 140 |
| 3rd | 420 | 120 |
| 4th | 530 | 110 |
| 5th | 650 | 120 |
| 6th | 740 | 90 |
| 7th | 890 | 150 |
| 8th | 1,050 | 160 |
| 9th | 1,270 | 120 |
| 10th | 1,430 | 160 |
| 11th | 1,620 | 190 |
| 12th | 1,790 | 170 |
| 13th | 1,980 | 190 |
| 14th | 2,160 | 180 |
| 15th | 2,420 | 260 |
| 16th | 2,630 (⚠️ Located on a hanging container over water ) | 210 |
| 17th | 2,920 | 290 |
| 18th | 3,180 | 260 |
| 19th | 3,390 (⚠️Located inside of a hanging container ) | 210 |
| 20th | 3,690 (⚠️ Located on the very left edge of an iron beam hanging on 1 rope ) | 300 |
| 21st | 4,000 | 310 |
| 22nd | 4,300 (⚠️ Located right above water, and inbetween the edge and a hanging container ) | 300 |
| 23rd | 4,580 | 280 |
| 24th | 4,880 | 300 |
| 25th | 5,190 | 310 |
| 26th | 5,480 | 290 |
| 27th | 5,800 | 320 |
| 28th | 6,180 (⚠️ Located on the second hanging iron beam with 2 ropes ) | 380 |
| 29th | 6,520 | 340 |
| 30th | 6,920 (⚠️ Located on the very left edge of a hanging container ) | 400 |
| 31st | 7,270 (⚠️ Located in a very tricky spot, inbetween a hanging container, and a hanging iron bean ) | 350 |
| 32nd | 7,650 | 380 |
| 33rd | 8,000 (⚠️ Located inside a hanging container ) | 350 |
| 34th | 8,370 (⚠️ Located right above water, and inbetween the edge and a hanging container ) | 370 |
| 35th | 8,790 | 420 |
| 36th | 9,210 (⚠️ Located right above water, and inbetween the edge and a hanging container ) | 420 |
| 37th | 9,660 | 450 |
| 38th | 10,080 | 420 |
| 39th | 10,480 (⚠️ Located inside a hanging container) | 400 |
| 40th | 10,900 | 420 |
| 41st | 11,420 (⚠️ Located at the edge of a water pit) | 520 |
| 42nd | 11,900 | 480 |
| 43rd | 12,380 | 480 |
| 44th | 12,840 | 460 |
| 45th | 13,380 | 540 |
| 46th | 13,860 | 480 |
| 47th | 14,340 | 480 |
| 48th | 14,850 | 510 |
| 49th | 15,370 (⚠️ Located inside the 3rd hanging container) | 520 |
| 50th | 15,980 | 610 |
| 51st | 16,520 | 560 |
| 52nd | 17,080 | 560 |
| 53rd | 17,610 | 530 |
| 54th | 18,150 | 540 |
| 55th | 18,730 | 580 |
| 56th | 19,370 | 640 |
| 57th | 19,940 | 570 |
| 58th | 20,590 | 650 |

Mountain
One of HCR2's original Adventure Levels, Mountain has its fair share of steep hills and descents. After climbing a few thousand meters, the mountain dirt turns to snow (for about 500 meters) and then turns back to dirt as you descend. After passing 6.5k, the ground permanently turns into snow. This level has occasional caves, slippery snow surfaces and steep hills. Vehicles such as the Dune Buggy, Super Diesel, Rally Car and Racing Truck are highly recommended. Winter Tires will help with the snow covered portions.
Difficulties
- A lot of steep hills
- A lot of bridges
- Underground areas that are dangerous for tall vehicles
- Logs dangling on ropes (after a few thousand meters)
- Loop areas. These areas are sometimes exposed outside or in caves. The underground ones all have logs hanging by 2 ropes rather than ground in the air. Some ropes might be flat, but some are tilted. All ropes hang by 2.
| Fuel position | Fuel location
(in meters) |
Gap between
2 fuels (in meters) |
|---|---|---|
| Start | Full tank | |
| 1st | 130 | 130 |
| 2nd | 210 | 80 |
| 3rd | 290 | 80 |
| 4th | 370 | 80 |
| 5th | 450 | 80 |
| 6th | 530 | 80 |
| 7th | 610 | 80 |
| 8th | 730 | 120 |
| 9th | 850 | 120 |
| 10th | 970 | 120 |
| 11th | 1,070 | 100 |
| 12th | 1,190 | 120 |
| 13th | 1,330 | 140 |
| 14th | 1,450 | 120 |
| 15th | 1,610 | 160 |
| 16th | 1,770 | 160 |
| 17th | 1,930 | 160 |
| 18th | 2,060 | 130 |
| 19th | 2,140 | 80 |
| 20th | 2,300 | 160 |
| 21st | 2,460 | 160 |
| 22nd | 2,660 | 200 |
| 23rd | 2,830 (Located on a
hanging log) |
170 |
| 24th | 3,070 | 250 |
| 25th | 3,270 | 200 |
| 26th | 3,470 | 200 |
| 27th | 3,890 | 420 |
| 28th | 4,130 | 240 |
| 29th | 4,370 | 240 |
| 30th | 4,640 | 270 |
| 31st | 4,910 | 270 |
| 32nd | 5,180 | 270 |
| 33rd | 5,420 | 240 |
| 34th | 5,720 (Located on
a hanging log) |
300 |
| 35th | 6,000 (Located on a
steep downhill) |
280 |
| 36th | 6,280 | 280 |
| 37th | 6,580 | 300 |
| 38th | 6,890 | 310 |
| 39th | 7,440 | 550 |
| 40th | 7,760 | 320 |
| 41st | 8,090 | 330 |
| 42nd | 8,400 | 310 |
| 43rd | 8,720 | 320 |
| 44th | 9,060 (On a bridge) | 340 |
| 45th | 9,430 | 370 |
| 46th | 9,790 | 360 |
| 47th | 10,180 | 390 |
| 48th | 10,550 | 370 |
| 49th | 10,910 | 360 |
| 50th | 11,270 | 360 |
| 51st | 11,630 | 360 |
| 52nd | 12,000 | 370 |
| 53rd | 12,390 | 390 |
| 54th | 12,780 | 390 |
| 55th | 13,200 | 420 |
| 56th | 13,590 | 390 |
| 57th | 14,010 | 420 |
| 58th | 14,420 | 410 |
| 59th | 14,860 | 440 |
| 60th | 15,370 | 510 |
| 61st | 15,800 | 430 |

Rustbucket Reef
An underwater level, where your character and vehicle are submerged in water. They are protected by a bubble that encloses the vehicle. There are enclosed tubes in this level that you drive into and out of in order to create a new bubble, if the old bubble popped. If your bubble ends up popping, you lose the aerodynamic effect and the water will slow you down.
Difficulties:
- Fuel canisters are very scattered across the track
- Ceilings and small tubes (bad for tall vehicles)
- Steep Hills that become hard to climb without a bubble
- Bubble recharge tubes often rare
- Broken boats, ships, and flagpoles appear everywhere
- Obstacles such as toxic tanks and coral reefs
- Ditches full of obstacles that are hard to avoid with slow vehicles or without a bubble
| Fuel position | Fuel location
(in meters) |
Gap between
2 fuels (in meters) |
|---|---|---|
| Start | Full tank | |
| 1st | 150 | 150 |
| 2nd | 300 | 150 |
| 3rd | 450 | 150 |
| 4th | 630 | 180 |
| 5th | 830 | 200 |
| 6th | 1,100 | 270 |
| 7th | 1,370 | 270 |
| 8th | 1,710 | 330 |
| 9th | 1,970 | 260 |
| 10th | 2,240 | 270 |
| 11th | 2,570 | 340 |
| 12th | 2,870 | 300 |
| 13th | 3,130 | 260 |
| 14th | 3,280 | 150 |
| 15th | 3,640 | 360 |
| 16th | 4,020 | 380 |
| 17th | 4,440 | 420 |
| 18th | 4,850 (This fuel is only a available if you take the upper route) | 410 |
| 19th | 4,870 | 20 |
| 20th | 5,320 | 450 |
| 21st | 5,740 | 420 |
| 22nd | 5,980 (Only accessible if you take the top route) | 240 |
| 23rd | 6,270 | 290 |
| 24th | 6,430 | 160 |
| 25th | 6,820 | 390 |
| 26th | 7,410 (⚠️ Located under a flagpole that is held up by a toxic container) | 590 |
| 27th | 7,910 | 500 |
| 28th | 8,440 | 530 |
| 29th | 8,730 | 290 |
| 30th | 9,000 (Only accessible if you take the top route, and is next to a broken ship) | 270 |
| 31st | 9,570 | 570 |
| 32nd | 10,120 | 550 |
| 33rd | 10,740 | 620 |
| 34th | 11,340 | 600 |
| 35th | 11,470 (This fuel is only a available if you take the upper route) | 130 |
| 36th | 12,030 | 560 |
| 37th | 12,630 (Located at the top of a hill) | 600 |
| 38th | 13,300 | 670 |
| 39th | 14,110 (Located on a steep downhill after a bubble tube) | 810 |
| 40th | 14,350 (This fuel is only a available if you take the upper route) | 240 |
| 41st | 14,850 | 500 |
| 42nd | 15,690 (You must take the bottom route) | 640 |
| 43rd | 16,560 | 870 |
| 44th | 17,300 | 740 |
| 45th | 17,800 | 500 |
| 46th | 18,160 (⚠️Located under a broken ship, unaccessible with Tank without magnet) | 360 |
| 47th | 18,960 | 800 |
| 48th | 19,870 | 910 |
| 49th | 20,720 | 850 |
| 50th | 20,930 (This fuel is only available if you take the bottom route) | 210 |
| 51st | 21,650 | 720 |
| 52nd | 22,530 | 880 |
| 53rd | 22,950 (This fuel is only available if you take the bottom route) | 420 |
| 54th | 23,510 | 560 |
| 55th | 24,400 | 890 |
| 56th | 25,030 (This fuel is only available if you take the upper route) | 630 |
| 57th | 25,360 | 330 |

Winter
The perfect map for exploring long distance travel! Are we there yet?
Winter has a lot of ups and downs in it. It starts out with small hills and slippery slopes. It has pools of water that are not a threat, provided your vehicle has enough grip. Fuel canisters are often rare in this level, so Fume Boost is recommended. After a few thousand meters, ice castles are introduced. These are slippery, and have roofs that you can hit your character's head, causing you to Neckflip, or crash. There are lots of dips and hills that get hard to pass, so Winter Tires and landing boost might help.
Difficulties:
- Long distance between fuel canisters
- Occasional Caves with icisles (Icicles can fall and cause a driver-down.)
- Ice castles (Winter Tires increase grip)
- Slippery slopes (Winter Tires might help)
- Snowmen that block the road (Hitting one head-on will cause a driver down)
| Fuel position | Fuel location
(in meters) |
Gap between
2 fuels (in meters) |
|---|---|---|
| Start | Full tank | |
| 1st | 150 | 150 |
| 2nd | 350 | 200 |
| 3rd | 550 | 200 |
| 4th | 750 | 200 |
| 5th | 950 | 200 |
| 6th | 1,150 | 200 |
| 7th | 1,440 | 290 |
| 8th | 1,680 | 240 |
| 9th | 1,950 | 270 |
| 10th | 2,200 | 250 |
| 11th | 2,480 | 280 |
| 12th | 2,800 (⚠️Located in
the sky, above a water pit before an ice castle). |
320 |
| 13th | 3,120 | 320 |
| 14th | 3,440 | 320 |
| 15th | 3,750 | 310 |
| 16th | 4,070 | 320 |
| 17th | 4,410 | 340 |
| 18th | 4,800 | 390 |
| 19th | 5,140 | 340 |
| 20th | 5,540 (Located on an icicle chunk after a downhill underground) | 400 |
| 21st | 5,870 | 330 |
| 22nd | 6,290 | 420 |
| 23rd | 6,700 | 410 |
| 24th | 7,130 | 430 |
| 25th | 7,540 | 410 |
| 26th | 7,930 | 390 |
| 27th | 8,360 | 430 |
| 28th | 8,810 | 450 |
| 29th | 9,270 | 460 |
| 30th | 9,720 | 450 |
| 31st | 10,180 | 460 |
| 32nd | 10,690 | 510 |
| 33rd | 11,190 | 500 |
| 34th | 11,680 | 490 |
| 35th | 12,180 | 500 |
| 36th | 12,680 | 500 |
| 37th | 13,260 | 580 |
| 38th | 13,840 | 580 |
| 39th | 14,390 | 550 |
| 40th | 14,920 | 530 |
| 41th | 15,490 | 570 |
| 42st | 16,100 | 610 |
| 43nd | 16,730 | 630 |
| 44rd | 17,340 | 610 |
| 45th | 17,960 | 630 |
| 46th | 18,550 | 590 |
| 47th | 19,190 | 640 |
| 48th | 19,870 | 680 |
| 49th | 20,540 | 670 |
| 50th | 21,180 | 640 |

Mines
Down in the Mines are all kinds of hidden treasure. But what's also hidden are dangerous traps. Because this is a cave level, high height vehicles may have a more difficult time getting through, as the ceiling changes from high to low as you drive. If you are using a high height vehicle, or a vehicle where the driver is more exposed, the rollcage part may be recommended. Down below are the fuel locations, as well as the type of obstacles to look out for.
Note: There are branching paths, and you will find some fuel pickups on either the upper path or lower path. Plan carefully when it comes to fuel management.
Difficulties:
• Rocks: While some are stationary, others can fall when they make contact with vehicles. Your vehicle can get stuck on the rocks, so be careful!
• Lava: Your first encounter will be at 2037m. These lava pits come in different shapes and sizes; even the small ones can end your run, so take caution. Although they aren't common at first, but as you drive further, they will start to reappear more often, to the point where stunt jumps will be made out of them. Taller vehicles have a better chance of escaping them than shorter vehicles.
• Giant Wheels: These are very heavy wheels found throughout the mine and they can crush you if you're not careful. There are 2 types:
- Type 1: The wheel itself is at the top of a hill or in the air. It will start rolling after coming close enough to a trigger point or making contact with a vehicle. You can either wait it out or rush through.
- Type 2: The wheel hangs by a chain. These are actually objects to help you make a jump. Although you don't have to take them, you'll have to go across them later on, as you'll start seeing them hang above lava.
• Outside areas: These aren't obstacles, but more of a change to the map, as the background will reveal a blue sky and the ceiling will be gone. You aren't going to see many of these though (Only 2 in less than 10,000m).
• Downhill drops: You may also see these as you drive along. You will catch speed, but be sure you can slow down in time. You can crash if you are going too fast. Not many really dangerous traps in these areas.
Hanging Ladders: These are held by 2 ropes and can move if they are hit very hard. Most of them are outside.
• Uphill climbs: These can be tricky to overcome, especially when you get even further into the mines, as they will have lava pits as the very bottom, which becomes the incentive that you must make it or it's game over. A fast vehicle such as Rally Car, is recommended for these obstacles.
| Fuel position | Fuel location
(in meters) |
Gap between
2 fuels (in meters) |
|---|---|---|
| Start | Full tank | |
| 1st | 170 | |
| 2nd | 410 | 240 |
| 3rd | 650 | 240 |
| 4th | 890 | 240 |
| 5th | 1,130 | 240 |
| 6th | 1,370 ( Upper path ) | 240 |
| 7th | 1,610 | 240 |
| 8th | 1,840 ( Lower path ) | 230 |
| 9th | 2,100 | 260 |
| 10th | 2,400 | 300 |
| 11th | 2,700 | 300 |
| 12th | 2,990 (Located on top of a giant wheel) | 290 |
| 13th | 3,120 | 130 |
| 14th | 3,330 | 200 |
| 15th | 3,610 | 280 |
| 16th | 3,880 | 270 |
| 17th | 4,200 | 320 |
| 18th | 4,510 | 310 |
| 19th | 4,870 | 360 |
| 20th | 5,240 | 370 |
| 21st | 5,600 | 360 |
| 22nd | 5,990 | 390 |
| 23rd | 6,370 | 380 |
| 24th | 6,720 (Located before a ditch) | 350 |
| 25th | 7,090 (⚠️ Located after a series of uphills) | 370 |
| 26th | 7,440 | 350 |
| 27th | 7,840 | 400 |
| 28th | 8,250 (Located on a hanging ladder outside) | 410 |
| 29th | 8,690 (Located after a giant lava pit) | 440 |
| 30th | 9,090 ( ⚠️ Located in between 2 lava pits ) | 400 |
| 31st | 9,580 | 490 |
| 32nd | 10,010 (Located after a steep, tight uphill with lava at the center of the hills) | 430 |
| 33rd | 10,400 (Located before an up-down wheel that could crush a vehicle) | 390 |
| 34th | 10,860 (Located before a series of see-saw ladders above a giant lava pit) | 460 |
| 35th | 11,280 | 420 |
| 36th | 11,730 | 450 |
| 37th | 12,250 | 520 |
| 38th | 12,760 | 510 |
| 39th | 13,230 | 470 |
| 40th | 13,730 | 500 |
| 41st | 14,200 (⚠️ Located after a rolling wheel inside a ditch where the wheel will get stuck in) | 470 |
| 42nd | 14,670 | 470 |
| 43rd | 15,160 | 490 |
| 44th | 15,740 | 580 |
| 45th | 16,260 | 520 |
| 46th | 16,770 | 510 |
| 47th | 17,310 | 560 |
| 48th | 17,890 | 580 |
| 49th | 18,460 | 570 |
| 50th | 19,000 | 540 |
| 51st | 19,540 | 540 |
| 52nd | 20,070 | 530 |
| 53rd | 20,680 | 610 |
| 54th | 21,940 | 1,260 |

Desert Valley
Desert Valley is a hot and long adventure but with a lot of various traps and speed tips. However, outside of traps, the road is quite flat, so it can be considered as a high speed map where you can go faster and offset the time you lost when going through difficult places. The more distance you reach, the more difficult traps you will see. Here is a summarized list of all fuel locations and biggest difficulties (which are described below) in Desert Valley.
Difficulties:
- Pit Caves: These caves have rocks that connect to the wall in front of you that form a bridge over trap. There are only 3 of these. The one at 850m has no trap, the one at 2130m has a DQ trap, and the one at 2560m has a lava trap. This is the only area with lava.
- Stop-Logs: These logs stand up and connect to a rock ceiling. When these are hit, they fall down and form a bridge over an empty pit. But, some go further down to where they are crooked, so try to make it over them without getting stuck. There are only 4: One at 2010m, one at 2390m, one at 3920m, and one at 8330m.
- Logs: Each log is held by 1 or 2 ropes (except for the Type-D) and will help you to travel a big hole which contains Deadly Quicksands (DQ) or nothing (/) (except for the Type-D).
- Type-A: (60 meters long on average) A log which is held by 2 ropes (different fixation points on the log) and is always horizontal. These are the most balanced ones. There are only 2 of these (1090m and 2630m). Also, the pits under them are easier to get out of.
- Type-B: (50 meters long on average) A log which is held by 2 ropes (different fixation points on the log) but, because the fixation points are at the same spot on a higher rock, they make the log follow an arc by swinging backwards and forwards. There are also only 2 of these (5290m and 5580m). If you fall in the 5600m pit, it is impossible to get out of it unless you are using a highly upgraded Rally Car or Dune Buggy.
- Type-C: (50 meters long on average) A log which is held only by 1 rope and its fixation point is at the center of the log. This means that the log can rotate on itself, which makes the Type-C the hardest to cross over. You will need exact timing to hope getting through this trap! These begin at 6700m and continue on through the map. If you fall in these (Except the 8000m one), you won't be able to get out of these unless you have a maxed Dune Buggy or highly upgraded Rally Car.
- Type-D: (70 meters long on average, but they're not logs.) 1, 2, or 4 big pieces of wood which are standing (floating) on deadly quicksands. You must drive on those wood pieces to go through this trap. Don't land on quicksands because you almost won't be able to go back on a wood piece and you will die!
- Remember, you can jump and/or fly over these so that you will have higher chances of surviving Type-C's.
- Caves: (80 meters long on average) Sometimes, caves will appear. Dangerous places for high height vehicles.
- Type-A: These caves stands in 2 small rocks (there is a space between them) that helps you to continue driving over a sort of small hole which contains a DQ. You can drive under them.
- Type-B: These caves are large and have water pits inside them. The first one (at 700m) does not have a water pit.
- Type-C: These caves are structured above a downhill, where there is a small hill under them. There are 2 small rocks that form the cave, with a bridge connecting the 2 rocks.
- Type-D: Similar to Type-C, but they don't have bridges connecting the rocks and have DQ's instead of small hills under the caves. There is also a ceiling rock above the 2nd rock.
- Type-E: A large cave with 2 large rocks forming a bridge over a DQ pit or an empty pit (/). These are the most dangerous caves.
- This obstacle being described is similar to Type-A caves, but has a log instead of 2 rocks.
- Sudden Climbs: Sometimes, big climbs appear, but they are short (45 meters long on average). This isn't really a trap dealing with the driver's head hitting something, but more a fuel trap. This means that, in the distance axis (X-axis), you will go way slower than on a flat road. So this category will help you to anticipate those climbs and reach the next fuel canister.
| Fuel position | Fuel location
(in meters) |
Gap between
2 fuels (in meters) |
Difficulties | |||
|---|---|---|---|---|---|---|
| Logs locations
(in meters) |
Caves locations
(in meters) |
Suddenly climbs
location (in meters) | ||||
| Start | Full tank | |||||
| 1st | 150 | 150 | ||||
| 2nd | 250 | 100 | ||||
| 3rd | 350 | 100 | ||||
| 4th | 450 | 100 | ||||
| 5th | 600 | 150 | ||||
| 6th | 750 | 150 | Type-B (690) | |||
| 7th | 920 | 170 | Type-A (/) (1,090) | |||
| 8th | 1,160 | 240 | ||||
| 9th | 1,360 | 200 | ||||
| 10th | 1,560 | 200 | ||||
| 11th | 1,800 | 240 | ||||
| 12th | 2,080 | 380 | ||||
| 13th | 2,340 | 260 | Type-C (2,290) | |||
| 14th | 2,580 | 240 | Type-A (DQ) (2,625) | |||
| 15th | 2,890 | 310 | ||||
| 16th | 3,220 | 330 | Type-B (Water) (2,980) | |||
| 17th | 3,550 | 330 | ||||
| 18th | 3,910 (before a
"stop-log") |
360 | Type-E (/) (4,191) | |||
| 19th | 4,300 | 390 | Type-D (4,395) | Type-E (/) (4,496) | ||
| 20th | 4,670 | 370 | 4,800 | |||
| 21st | 5,100 (in a cave) | 430 | Type-B (/) (5,325) | |||
| 22nd | 5,540 (climbing) | 440 | Type-B (DQ) (5,607)
Type-D (5,770) |
|||
| 23rd | 6,000 (climbing) | 460 | 6,195 | |||
| 24th | 6,420 (on a rock) | 420 | Type-C (DQ) (6,700) | |||
| 25th | 6,870
(stiff downhill) |
450 | (/) (7,285) | |||
| 26th | 7,320 (in a cave;
at the bottom) |
450 | 7,460 | |||
| 27th | 7,770 | 450 | Type-C (DQ) (7,905)
Type-C (/) (8,042) Type-D (8,195) |
|||
| 28th | 8,350 (after a
"stop-log") |
580 | (/) (8,835) | |||
| 29th | 8,870 (in a cave;
at the bottom) |
520 | ||||
| 30th | 9,380 | 510 | Type-D (9,889) | |||
| 31st | 9,980 | 600 | Type-C (DQ) (10,076) | (DQ) (10,389)
(DQ) (10,523) |
||
| 32nd | 11,140 (downhill) | 1,160 | (/) (11,552) | |||
| 33rd | 11,700 | 560 | ||||
| 34th | 12,300 | 600 | (DQ) (12,425) | |||
| 35th | 12,890 | 590 | 13,418 | |||
| 36th | 13,520
(stiff downhill) |
630 | (/) (13,574)
(DQ) (14,103) |
|||
| 37th | 14,210 | 690 | ||||
| 38th | 14,870 (downhill) | 660 | (DQ) (15,229) | |||
| 39th | 15,570 (climbing) | 700 | Type-C (DQ) (15,953)
Type-C (DQ) (16,287) |
(/) (15,803) | 15,640 | |
| 40th | 16,300 (floating
over the mud lake) |
730 | Type-C (DQ) (16,671)
Type-C (DQ) (16,945) |
|||
| 41st | 17,060 | 760 | Type-C (DQ) (17,171) | (DQ) (17,525)
(DQ) (17,691) |
||
| 42nd | 17,800 | 740 | (/) (17,834) | |||
| 43rd | 18,560 (downhill) | 760 | Type-C (DQ) (18,589) | (/) (18,807)
(/) (19,176) |
||
| 44th | 19,320 | 760 | Type-D (19,694) | |||
| 45th | 20,130 | 810 | Type-C (DQ) (20,511)
Type-D (20,695) |
(DQ) (20,336) | ||
| 46th | 20,960 | 830 | (/) (21,698) | |||
| 47th | 21,800 | 840 | ||||
| 48th | 22,650 | 850 | (/) (22,954) | |||
| 49th | 23,480 | 830 | Type-D (23,811) | |||
| 50th | 24,380 | 900 | 25,032 | |||
| 51st | 25,220 | 840 | Type-D (25,705)
Type-D (25,912) |
25,474 | ||
| 52nd | 26,150 (climbing) | 930 | Type-D (26,267) | (DQ) (27,006) | ||
| 53rd | 27,090 | 950 | 27,872 | |||
| 54th | 28,010 | 920 | 28,346
28,830 | |||
| 55th | 28,910
(stiff downhill) |
900 | Type-D (29,566) | 29,017 | ||
| 56th | 29,860 | 950 | Type-D (30,010) | |||
| 57th | 30,870 | 1,010 | Type-D (31,343) | (DQ) (31,138) | ||
| 58th | 31,910 (downhill) | 1,040 | Type-D (32,238) | (/) (31,942)
(/) (32,776) |
||
| 59th | 32,870 | 960 | Type-C (DQ) (33,166)
Type-C (DQ) (33,632) |
33,788 | ||
| 60th | 33,850
(top of a hill) |
980 | ||||
| 61st | 34,880 | 1,030 | (/) (35,329)
(DQ) (35,506) (/) (35,668) |
|||
| 62nd | 35,930 | 1,050 | Type-C (DQ) (36,228) | (DQ) (36,435) | ||
| 63rd | 36,980 (climbing) | 1,050 | Type-C (DQ) (37,646) | (/) (37,464)
(DQ) (37,801) |
||
| 64th | 38,070 | 1,090 | Type-D (38,822)
Type-D (39,986) |
(DQ) (39,175) | 38,130
38,581 | |
| 65th | 40,270 | 2,200 | Type-D (40,376)
Type-C (DQ) (41,217) Type-D (41,365) |
(/) (41,031) | ||
| 66th | 41,450 | 1,180 | (/) (41,530)
(DQ) (41,673) |
42,123 | ||
| 67th | 42,550 (downhill) | 1,100 | ||||
| 68th | 43,710 | 1,160 | ||||
| 69th | 44,920 | 1,210 | ||||
| 70th | 46,110 | 1,190 | ||||
| 71st | 47,340 | 1,230 | ||||
| 72nd | 48,560 | 1,220 | ||||
| 73rd | 49,780 | 1,220 | ||||
| 74th | 51,080 | 1,300 | ||||
| 75th | 52,410 | 1,330 | ||||
| 76th | 53,690 | 1,280 | ||||
| 77th | 55,060 | 1,370 | ||||
| 78th | 56,400 | 1,340 | ||||
| 79th | 57,740 | 1,340 | GloomvaleNo information yet. n | |||
| 80th | 59,150 | 1,410 | ||||
| 81st | 60,510 | 1,360 | ||||
| 82nd | 61,880 | 1,370 | ||||
| 83rd | 63,340 | 1,460 | ||||
| 84th | 64,750 | 1,410 | ||||
| 85th | 66,160 | 1,410 | ||||
| 86th | 67,660 | 1,500 | ||||
| 87th | 69,220 | 1,560 | ||||
| 88th | 70,710 | 1,490 | ||||

Beach
Bill loves long drives on the beach!
Beach has steep hills, water and caves. It is a mix of all the previous Adventure Levels, containing water, slippy slopes, beach houses blocking the way and more. Fuel canisters are often rare after the 2,000 meter mark. Due to the steep slopes, vehicles such as the Dune Buggy are highly recommended. Fume Boost is also recommended, due to the ability to jump over giant dips with it running and shortage of fuel in certain places. Vehicles such as Tractor and Tank are great at destroying the beach houses, but may suffer when climbing the many steep hills. After 7400m though, there appears flat grounds that allow to catch speed and help get to fuels faster. You can do wheelies on them, and you also can charge up your overcharged turbo to get a speed boost here.
Difficulties:
- Long distance between fuel canisters
- Super Steep hills (They become more rare after 7400m
- Beach houses - Some block entrances to caves while others block the path in front of you.
- Water (Can slow you down, but boats and the Snowmobile do well here)
| Fuel position | Fuel location
(in meters) |
Gap between
2 fuels (in meters) |
|---|---|---|
| Start | Full tank | |
| 1st | 150 | 150 |
| 2nd | 300 | 150 |
| 3rd | 450 | 150 |
| 4th | 600 | 150 |
| 5th | 800 | 200 |
| 6th | 1,020 | 220 |
| 7th | 1,270 | 250 |
| 8th | 1,530 | 260 |
| 9th | 1,800 | 270 |
| 10th | 2,050 | 250 |
| 11th | 2,360 | 310 |
| 12th | 2,640 | 280 |
| 13th | 3,030 | 290 |
| 14th | 3,330 | 300 |
| 15th | 3,690 | 330 |
| 16th | 4,040 | 350 |
| 17th | 4,470 | 430 |
| 18th | 4,890 | 420 |
| 19th | 5,270 | 380 |
| 20th | 5,700 | 430 |
| 21st | 6,140 | 440 |
| 22nd | 6,600 | 460 |
| 23rd | 7,080 | 480 |
| 24th | 7,520 | 440 |
| 25th | 8,030 | 510 |
| 26th | 8,530 | 500 |
| 27th | 9,030 | 500 |
| 28th | 9,580 | 550 |
| 29th | 10,130 | 550 |
| 30th | 10,680 | 550 |
| 31st | 11,270 | 590 |
| 32nd | 11,900 | 630 |
| 33rd | 12,590 | 690 |
| 34th | 13,180 | 590 |
| 35th | 13,870 | 690 |
| 36th | 14,520 | 650 |
| 37th | 15,180 | 660 |
| 38th | 15,870 | 690 |
| 39th | 16,590 | 720 |
| 40th | 17,280 | 690 |
| 41st | 18,030 | 750 |
| 42nd | 18,910 | 880 |
| 43rd | 19,660 | 750 |
| 44th | 20,460 | 800 |
| 45th | 21,260 | 800 |
| 46th | 22,060 | 800 |
| 47th | 22,860 | 800 |
| 48th | 23,720 | 860 |
| 49th | 24,600 | 880 |
| 50th | 25,430 | 830 |
| 51st | 26,440 | 1,010 |
| 52nd | 27,340 | 900 |
| 53rd | 28,250 | 910 |
| 54th | 29,150 | 900 |
| 55th | 30,090 | 940 |
| 56th | 31,050 | 960 |
| 57th | 32,020 | 970 |
| 58th | 33,020 | 1,000 |
| 59th | 34,080 | 1,060 |
| 60th | 35,080 | 1,000 |
| 61st | 36,180 | 1,100 |
| 62nd | 37,250 | 1,070 |
| 63rd | 38,300 | 1,050 |
| 64th | 39,460 | 1,160 |
| 65th | 40,600 | 1,140 |
| 66th | 41,700 | 1,100 |
| 67th | 42,850 | 1,150 |
| 68th | 43,970 | 1,120 |
| 69th | 45,120 | 1,150 |
| 70th | 46,270 | 1,150 |
| 71st | 47,420 | 1,150 |
| 72nd | 48,750 | 1,330 |
| 73rd | 49,950 | 1,200 |
| 74th | 51,150 | 1,200 |
| 75th | 52,400 | 1,250 |
| 76th | 52,670 (This fuel is only a available if you take the bottom route) | 270 |

Backwater Bog
Conquer the muddy slopes of the Backwater Bog!!
This level has very slippery slopes, breakable objects (such as camper caravans, grills and lawn chairs) that need to be broken in order to continue onward. Backwater bog also has mud pools, which are similar to the quicksand in Desert Valley. The mud pools swallow up your car, make continuing impossible. Escaping is almost impossible, unlike Desert Valley's quicksands.
Difficulties:
- Mud pools (Some have bridges over them, but this is rare)
- Water (Some pools are underground, so be careful with high height vehicles)
- Breakable objects
- Slippy slopes
| Fuel position | Fuel location
(in meters) |
Gap between
2 fuels (in meters) |
|---|---|---|
| Start | Full tank | |
| 1st | 150 | 150 |
| 2nd | 300 | 150 |
| 3rd | 600 | 300 |
| 4th | 800 | 200 |
| 5th | 1,000 | 200 |
| 6th | 1,200 | 200 |
| 7th | 1,490 | 290 |
| 8th | 1,760 | 270 |
| 9th | 2,020 | 260 |
| 10th | 2,310 | 290 |
| 11th | 2,690 | 280 |
| 12th | 2,990 | 300 |
| 13th | 3,380 | 390 |
| 14th | 3,770 | 390 |
| 15th | 4,230 | 460 |
| 16th | 4,670 | 430 |
| 17th | 5,060 | 490 |
| 18th | 5,500 | 440 |
| 19th | 5,900 | 400 |
| 20th | 6,360 | 460 |
| 21st | 6,800 | 440 |
| 22nd | 7,270 | 470 |
| 23rd | 7,730 | 460 |
| 24th | 8,280 | 550 |
| 25th | 8,840 | 540 |
| 26th | 9,340 | 500 |
| 27th | 9,950 | 610 |
| 28th | 10,470 | 520 |
| 29th | 11,080 | 610 |
| 30th | 11,730 | 690 |
| 31st | 12,330 | 600 |
| 32nd | 12,930 | 600 |
| 33rd | 13,580 | 650 |
| 34th | 14,230 | 650 |
| 35th | 14,940 | 710 |
| 36th | 15,600 | 660 |
| 37th | 16,280 | 680 |
| 38th | 17,060 | 780 |
| 39th | 17,850 | 790 |
| 40th | 18,670 | 820 |
| 41st | 19,430 | 760 |
| 42nd | 20,280 | 850 |
| 43rd | 21,110 | 830 |
| 44th | 21,930 | 820 |
| 45th | 22,730 | 800 |
| 46th | 23,540 | 820 |
| 47th | 24,400 | 860 |
| 48th | 25,260 | 860 |
| 49th | 26,180 | 920 |
| 50th | 27,120 | 940 |
| 51st | 28,020 | 900 |
| 52nd | 28,910 | 890 |
| 53rd | 29,890 | 980 |
| 54th | 30,840 | 950 |
| 55th | 31,790 | 950 |
| 56th | 32,750 | 960 |
| 57th | 33,830 | 980 |
| 58th | 34,850 | 1,020 |
| 59th | 35,960 | 1,110 |

Racer Glacier
Be the first to explore the abandoned Racier Glacier!
Racier Glacier is a difficult level to conquer. It has steep hills, slippery slopes, wind that blows your car around and lava that can ruin your run. At around 700 meters, you will encounter your first real cave. To get past this obstacle, you will need to jump, land on some dinosaur bones and continue towards the end, being careful not to fall into the lava.
Once you have passed this milestone, you need to beware of the strong winds that blow here. They are powerful enough to blow your car forward or backward and can ruin your run.
For this level, vehicles like Super Diesel are highly recommended, because they are stable and have good fuel efficiency.
Difficulties:
- Strong wind (This only is encountered outside in the cold area)
- Caves with lava (Some have stalagmites and stalactites, and some have dinosaur bones)
- Steep hills with slippery surfaces (Forward blowing winds could help you climb them)
- Lots of different paths to take (Some have rock bridges)
| Fuel position | Fuel location
(in meters) |
Gap between
2 fuels (in meters) |
|---|---|---|
| Start | Full tank | |
| 1st | 150 | 150 |
| 2nd | 330 | 180 |
| 3rd | 460 | 130 |
| 4th | 630 (This fuel is only a available if you take the bottom route) | 160 |
| 5th | 840 (This fuel is only a available if you take the bottom route) | 210 |
| 6th | 1050 | 210 |
| 7th | 1,250 | 200 |
| 8th | 1,500 (This fuel is only a available if you take the bottom route) | 250 |
| 9th | 1,600 (This fuel is only a available if you take the upper route) | 100 |
| 10th | 1,750 | 150 |
| 11th | 2,040 | 290 |
| 12th | 2,280 | 240 |
| 13th | 2,590 | 210 |
| 14th | 2,890 | 300 |
| 15th | 3,180 | 290 |
| 16th | 3,540 | 360 |
| 17th | 3,940 (This fuel is only a available if you take the upper route) | 400 |
| 18th | 4,240 | 300 |
| 19th | 4,640 | 400 |
| 20th | 5,040 | 400 |
| 21st | 5,520 | 480 |
| 22nd | 5,940 | 420 |
| 23rd | 6,350 | 410 |
| 24th | 6,840 | 590 |
| 25th | 7,360 | 520 |
| 26th | 7,560 (This fuel is only a available if you take the upper route) | 200 |
| 27th | 7,900 | 340 |
| 28th | 8,400 | 500 |
| 29th | 8,900 | 500 |
| 30th | 9,400 | 500 |
| 31st | 9,990 | 590 |
| 32nd | 10,550 | 560 |
| 33rd | 11,170 | 620 |
| 34th | 11,720 (This fuel is only a available if you take the upper route) | 550 |
| 35th | 12,380 | 660 |
| 36th | 12,980 | 600 |
| 37th | 13,630 | 650 |
| 38th | 14,280 | 650 |
| 39th | 14,930 | 650 |
| 40th | 15,580 | 650 |
| 41st | 16,330 | 750 |
| 42nd | 17,020 | 690 |

Patchwork Plant
Occupational health and safety?
What is that?
Extremely difficult route. On the back the background shows conveyors with details: Fast and Furious, Control in the air, accelerator-FLIC FLAC, Enhanced turbo and coin-operated accelerator; as well as Claws.
On the highway there are some obstacles:
Levers: Touch the lever—the Patchwork Plant or smashing robots is switched on.
Conveyors: Speed up or slow down the machine depending on which way they go.
Boxes: They are stationary, fall or move along conveyors. Similar boxes can be found on the highway stagnant swamp. These boxes can be destroyed or dented by machines or robots.
Gears: Round obstacles that don't cause much difficulty if they don't hang in the air. Often meet.
Robots: They are activated by black and yellow levers. A very difficult obstacle that raises and lowers the hands with the load. It can crush a car or crates.
Magnets: There are two types of magnets.
Type A: Hanging at the top, pulling the car up. You can turn it on by turning the factory lever and shut it off by touching it.
Type B: The same, only hanging at the bottom.
| Fuel position | Fuel location
(in meters) |
Gap between
2 fuels (in meters) |
|---|---|---|
| Start | Full Tank | |
| 1st | 150 | 150 |
| 2nd | 210 (This fuel is only a available if you take the upper route) | 60 |
| 3rd | 470 | 260 |
| 4th | 630 | 160 |
| 5th | 830 | 200 |
| 6th | 1,020 | 190 |
| 7th | 1,350 | 320 |
| 8th | 1,610 | 260 |
| 9th | 1,890 | 280 |
| 10th | 2,160 | 270 |
| 11th | 2,460 | 300 |
| 12th | 2,780 | 320 |
| 13th | 3,120 | 340 |
| 14th | 3,420 | 300 |
| 15th | 3,770 | 350 |
| 16th | 4,180 | 410 |
| 17th | 4,530 | 350 |
| 18th | 4,980 | 450 |
| 19th | 5,450 | 470 |
| 20th | 5,860 | 410 |
| 21st | 6,310 | 450 |
| 22nd | 6,760 | 450 |
| 23rd | 7,210 | 450 |
| 24th | 7,710 | 500 |
| 25th | 8,330 | 620 |
| 26th | 8,810 | 480 |
| 27th | 9,310 | 500 |
| 28th | 9,880 | 570 |
| 29th |
10,470 | 590 |
| 30th | 11,060 | 590 |
| 31st | 11,640 | 580 |
| 32nd | 12,260 | 620 |
| 33rd | 12,870 | 610 |
| 34th | 13,520 | 650 |
Difficulties:
logs.
in.
though.
enough.
Gloomvale.
Special Maps
Sky Rock Outpost
The sky rock outpost is a map in which it will make your vehicle very light, and also you can make coins easy because you can do a lot of flips easily due to the vehicle's lightness. This map does contain some difficulties:
- You can pass up a fuel tank if you are going too fast due to there being little gravity
- There are rocks that can slow you down
- There are tons of satellites everywhere
- Some steep hills
| Fuel position | Fuel location
(in meters) |
Gap between
2 fuels (in meters) |
|---|---|---|
| Start | Full tank | |
| 1st | 150 | |
| 2nd | 300 | 150 |
| 3rd | 450 | 150 |
| 4th | 600 | 150 |
| 5th | 800 | 200 |
| 6th | 1,000 | 200 |
| 7th | 1,200 | 200 |
| 8th | 1,450 | 250 |
| 9th | 1,550 | 100 |
| 10th | 1,700 | 250 |
| 11th | 1,950 | 250 |
| 12th | 2,250 | 300 |
| 13th | 2,600 | 250 |
| 14th | 2,950 | 350 |
| 15th | 3,050 | 100 |
| 16th | 3,300 | 250 |
| 17th | 3,750 | 350 |
| 18th | 4,100 | 350 |
| 19th | 4,250 | 150 |
| 20th | 4,480 | 230 |
| 21st | 4,720 | 240 |
| 22nd | 4,900 | 180 |
| 23rd | 5,290 | 390 |
| 24th | 5,610 | 320 |
| 25th | 6,010 | 400 |
| 26th | 6,470 | 460 |
| 27th | 6,900 | 430 |
| 28th | 7,070 | 170 |
| 29th | 7,370 | 300 |
| 30th | 7,440 | 70 |
| 31st | 7,880 | 440 |
| 32nd | 7,970 | 90 |
| 33rd | 8,370 | 400 |
| 34th | 8,970 | 600 |
| 35th | 9,470 | 500 |
| 36th | 10,010 | 540 |
| 37th | 10,220 | 210 |
| 38th | 10,580 | 360 |
| 39th | 11,170 | 590 |
| 40th | 11,760 | 590 |
| 41st | 12,370 | 610 |
| 42nd | 14,280 | 1,910 |
| 43rd | 14,950 | 670 |
| 44th | 15,690 | 740 |
| 45th | 16,390 | 700 |
| 46th | 17,090 | 700 |
| 47th | 17,880 | 790 |
| 48th | 18,690 | 810 |
| 49th | 19,680 | 990 |
| 50th | 20,730 | 1,050 |
| 51nd | 22,450 | 1,720 |

Forest Trials
A true test of skills awaits those who challenge these perilous trials.
Main Lookouts:
- Tons of swinging and stationary logs everywhere
- Caves and rocks all in the map
- Decks that are dangerous for high-height vehicles
- Lots of steep hills
| Fuel position | Fuel location
(in meters) |
Gap between
2 fuels (in meters) |
|---|---|---|
| Start | Full tank | |
| 1st | 160 | |
| 2nd | 350 | 190 |
| 3rd | 540 | 190 |
| 4th | 810 | 270 |
| 5th | 1,070 | 260 |
| 6th | 1,370 | 300 |
| 7th | 1,740 | 370 |
| 8th | 2,080 | 340 |
| 9th | 2,440 | 360 |
| 10th | 2,840 | 400 |
| 11th | 3,320 | 480 |
| 12th | 3,770 | 450 |
| 13th | 4,240 | 470 |
| 14th | 4,740 | 500 |

Intense City
The ultimate balancing act between grippy tarmac and slippery girders.
Main Lookouts:
- Tons of iron beams that are slippery
- Lots of containers everywhere
- Deadly Pits full of water that must be passed
- Lots of steep hills and caves
| Fuel position | Fuel location
(in meters) |
Gap between
2 fuels (in meters) |
|---|---|---|
| Start | Full tank | |
| 1st | 170 | |
| 2nd | 300 | 130 |
| 3rd | 420 (This fuel is only a available if you take the bottom route) | 120 |
| 4th | 540 | 120 |
| 5th | 650 | 110 |
| 6th | 760 | 110 |
| 7th | 890 | 130 |
| 8th | 1,150 (This fuel is only a available if you do the loop) | 260 |
| 9th | 1,250 (This fuel is only a available if you take the bottom route) | 100 |
| 10th | 1,430 | 180 |
| 11th | 1,520 (This fuel is only a available if you take the upper route) | 90 |
| 12th | 1,610 | 90 |
| 13th | 1,780 | 160 |
| 14th | 1,970 | 190 |
| 15th | 2,160 | 190 |
| 16th | 2,370 (This fuel is only a available if you take the upper route) | 210 |
| 17th | 2,390 (This fuel is only a available if you take the bottom route) | 230 (from 15th fuel) |
| 18th | 2,640 | 250 |
| 19th | 2,810 (This fuel is only a available if you take the bottom route) | 170 |
| 20th | 2,870 (This fuel is only a available if you take the upper route) | 60 |
| 21st | 2,980 (This fuel is only a available if you take the upper route) | 110 |
| 22nd | 3,110 | 130 |
| 23rd | 3,350 | 240 |
| 24th | 3,590 | 240 |
| 25th | 3,780 | 190 |
| 26th | 3,880 | 100 |
| 27th | 3,960 | 80 |
| 28th | 4,190 | 230 |
| 29th | 4,490 | 300 |
| 30th | 4,800 | 310 |

Raging Winter
Battle against the blizzards and the bergy bits.
Main Lookouts:
- Lots of ice castles that are super slippery
- Extremely powerful winds that make your vehicle move around and can push you up hills
- Tons of steep hills
- Deadly pits full of water that must be passed
- Snowmen all over the map
- Ice chunks floating in the water
| Fuel position | Fuel location
(in meters) |
Gap between
2 fuels (in meters) |
|---|---|---|
| Start | Full tank | |
| 1st | 190 | |
| 2nd | 290 | 100 |
| 3rd | 370 | 80 |
| 4th | 570 | 200 |
| 5th | 720 | 150 |
| 6th | 870 | 150 |
| 7th | 1,020 | 150 |
| 8th | 1,170 | 150 |
| 9th | 1,370 | 200 |
| 10th | 1,570 | 200 |
| 11th | 1,800 | 230 |
| 12th | 2,000 | 200 |
| 13th | 2,210 | 210 |
| 14th | 2,420 (Inside the castle, wait until the blizzard activates) | 210 |
| 15th | 2,540 | 120 |
| 16th | 2,790 | 250 |
| 17th | 3,040 | 250 |
| 18th | 3,290 | 250 |
| 19th | 3,350 (Inside the ice wall, wait until the blizzard activates) | 60 |
| 20th | 3,360 (Wait until the blizzard activates) | 10 |
| 21st | 3,540 | 190 |
| 22nd | 3,840 | 300 |
.png)